Hello everybody, starting in the Medical Bay at full health and power, make your way to the entrance to Gamma Antenna. Around to the right is a door leading back into the Delta Quadrant; carefully approach the door and take out the Cyborg Elite. If he’s not there, he’ll be on the other side of the door. On the other side of the door is a small landing with stairs leading down to the left. At the bottom of the stairs, to the right, is a door back into the Delta Quadrant. This door requires a security level of 18% or less to open; destroying the three cameras in the CPU Node room and the CPU Nodes will bring the security level down below 18%. Returning to the entrance to Gamma Antennae, look to your right; there are boxes that you can climb. On the ledge above the boxes is a full health med-kit. Be aware that there is a hidden door in front of the boxes; inside the door is a Security 2 Bot. This door will open automatically if you get too close. If you notice that the door is open after you retrieve the med-kit, move to the side to get ready to take it out. With your Rapier equipped and loaded with a power attack, enter the hidden room and neutralize the bot; one power and two normal strikes will do the job. The Gamma Antennae door leads to a small room and then a bigger room with three doors: one each on the left and right and one straight ahead across from the entrance.
The Antennae Room
The antennae is behind the door that’s straight ahead; be ready to take out the Security 2 Bot when you open the door. Additionally, this antenna room is a trap; when the Plastique is placed on the antennae, the exit door will lock, requiring you to rewire an electrical panel to open it. Since it’s unlikely that you’ll have time to rewire the panel before the Plastique detonates, the use of a Logic Probe will be necessary. Besides the antennae, there is a camera in the room to take out; it’s to the left of the antennae.
The Room On The Right.
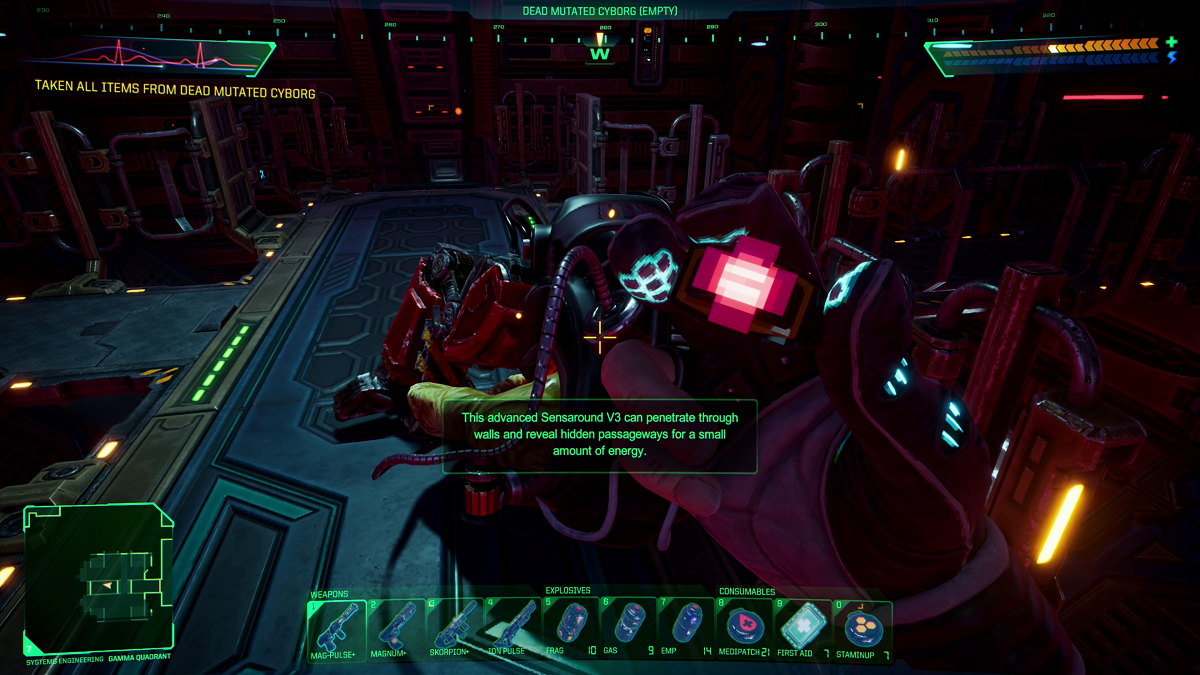
The room on the right is patrolled by a Mutated Cyborg, so it has to be dealt with before exploring the room. The Ion rifle set to the over-setting is very effective, requiring only two power shots to take it out. Don’t forget to loot the corpse; it’s carrying the V3 Sensaround Unit. On the left side of the room, about halfway in, is the elevator that services the Security Level. On the other side of the room, there’s a counter along the north wall; on the counter, there’s one health patch and an audio log. The audio log is from Arnold Hessman; in it, he’s raising a concern about the lower core access to Gamma Quadrant. I’m not sure what the significance of this audio log is at this point other than the Gamma Quad door off the core is broken. At the back of the room, the gangway leads down to end eventually at an electrical panel that needs rewiring. There’s a good chance that this puzzle is not the same as the one in your play through; all I can offer is that sometimes it helps if you go backwards from the end and figure that out first. This panel controls the lift platform that goes up into Delta Quadrant.
The Room On The Left.
This room is patrolled by a Security 2 Bot, so the first order of business is to neutralize it; then you can explore the room. The Security 2 Bot patrols back and forth on the force bridge that’s on the other side of the doorway entrance, so the Ion Rifle is the first choice for ranged shots, then the Mag-Pulse Rifle. There is a second exit on the left side of the room that is opened by a switch on the wall beside it. This exit leads back to the Gamma Antennae entrance, so if you’re low on power, the Medical Bay is not far from there. At the back of the room, there’s a door on the left; this door is a one-way door; once you enter, the door will lock behind you and can’t be opened. Not to worry though, there is another way out. The room is fairly big, rectangular in shape, with an Ammo Vending Machine on the right and a bulkhead door on the left. Also, there are several storage crates with lots of good stuff that include 2 Railgun projectiles, a shotgun with both kinds of ammo, 50 Teflon-coated rounds, and 24 rounds for the Magnum 2100 Pistol. The vending machine dispenses 48 Penetrator rounds for the Assault Rifle, but before you can access it, you’ll have to deal with the Cyborg Enforcer that’s standing in front of it. The exit to this part of Gamma Quadrant is on the other side of the bulkhead door; there’s a switch on the wall to the left that opens the door. There are two Cyborg Enforcers in the little room on the other side of the bulkhead door, so be ready to take them out. In the video, I stayed by the door on the left and ended up using 5 rounds of Mag-Pulse ammo to take the second Cyborg down. A better strategy would be to hit the switch to open the door and quickly run into the corner where the vending machine is; this location offers much better cover, and you won’t get hit when they shoot. You’ll have plenty of time to take them out, and they’ll go down long before they get to your position. There is a panel to rewire in the room where the Cyborgs were to open a secret door back into the CPU Node room. This panel was made up of single and double power leads and two types of switches. If your panel isn’t the same as this one, you can still use the same solving rules. The double power leads go to the longer circuits and the single to the shorter circuits. With the panel rewired, two secret doors open, allowing travel back to the CPU Node room and from there back to the Medical Bay to heal and recharge. That brings this post to an end; thanks for reading; I appreciate your time and interest. May God bless you today.