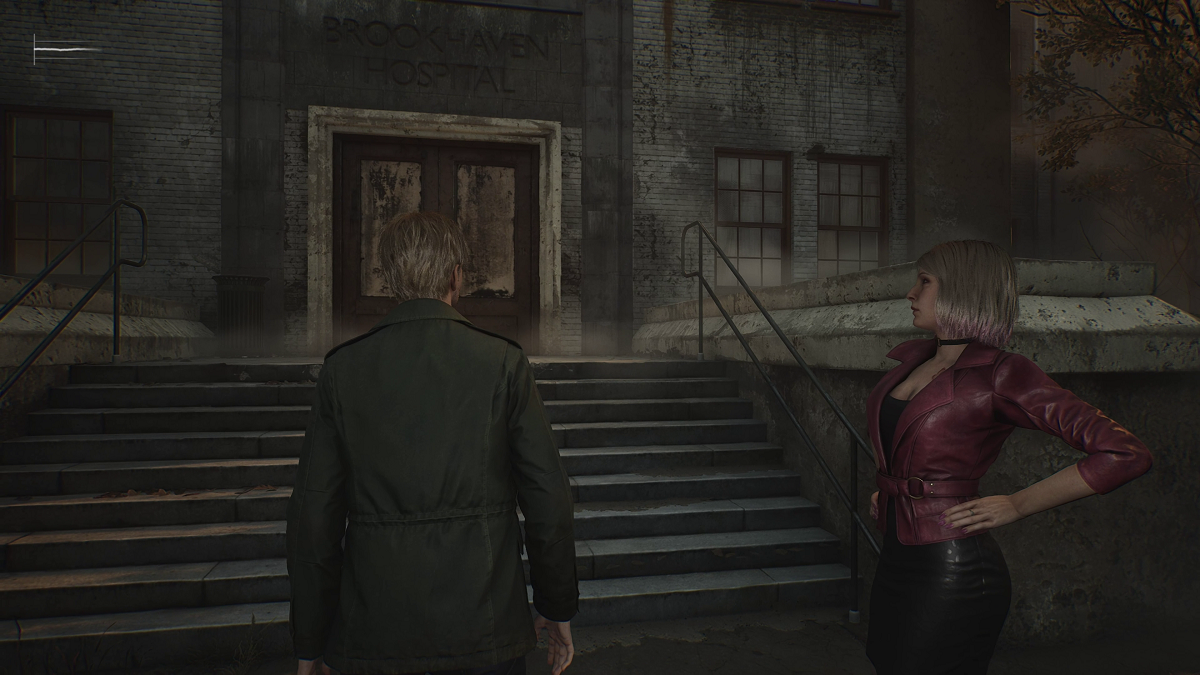
This video series will include every video relating to the Brookhaven Hospital
For this first video there were no enemies.
Since Laura ran into the hospital the doors are now open. Just inside the entrance on the right is the Security office, in one of the drawers is some shotgun shells and on the wall a gun cabinet but there’s no shotgun there. There are maps of the first three floor in the lobby in a magazine stand against the north wall. To the left of that are the Reception and the Reception office, there is a note in Reception on the bulletin board about the key locker, in it all staff are instructed to memorize the combination and in case of any problems report to the head nurse in Examination room 3 so that’s one of the rooms you can get into. To the right at the corner of the hallway is the southwest stairwell that leads to the basement and the second floor. When you enter the stairwell a cutscene starts showing Laura drawing on the wall, when she notices James and Maria she runs up the stairs and onto the second floor. Maria asks why Laura would run from them and all James offered was that she didn’t like him very much and with that the cutscene ends. The second floor door is locked and so it the basement door but there is some ammo at the bottom of the stairwell so go down and pick them up before you return to the main floor. On the main floor turn right and head down that hallway, on the left is an elevator but it doesn’t work, because there is no electricity, and the doors at the end are locked but on your right are big windows that you can break that lead to Examination room 3. There’s a health drink in the cabinet on the left and a syringe in a first aid kit on the table. The door to the office is ajar and in the desk drawer in a note on how to remember the key locker combination, it instructs you to go to the lobby and look around, Nurses. Doctors. Trees. James will update the map with that info when you’re finished reading . In the next room is some shotgun shells and a door that leads back into the hallway. Return to the lobby and go into the bathroom to the right of the entrance and pick up the health drink that’s sitting on the ledge above the radiator. Now return to the lobby and look for the three pictures, two of them are in the hallway outside the Reception office and the third is kind of out of the way in a poorly lit corner to the right of the entrance above a bench, the pictures will shows, 7 nurses, 2 doctors and 4 trees so that’s the combination to the key cabinet, so head to the office and dial in the numbers, the lock will disappear allowing access to the one key that’s in there, the Basement key, there’s also a manual save block on the desk.
Before heading out I went into the Reception Office because I missed a note on the wall when I was in there before about the records for three crucial patients being requested to be brought to the office. I didn’t see those records so they might show up later. Anyway now that you have the key to the basement make your way down there, when you open the door there’s a map of the basement on the wall across from the entrance. While you’re studying the map Maria will check the elevator, which is not working. To the left of the map is a locked metal gate door and to the right the elevator, tech room, and pump room at the end. Continue down the hallway to the pump room, just before the pump room on the right is a metal bar wall covered with wood, there’s a gap in the wood and if you look carefully you could catch a glimpse of the Manikin hiding in the corner. In the pump room on the right is some ammo which is very dark and your flashed light doesn’t shine very far. The next room is the generator room, the generator is at the back but it’s out of fuel so you need a gas can and a fuel supply. The generator room exits into another hallway, on the left is a Manikin hiding at the end of the counter and a health drink in one of the cabinets. Off the hallway are two boiler rooms on the left, a laundry storage, laundry room on the right and a supply room at the end on the right.
Boiler Room 1
Have your pistol ready and reloaded before you slowly enter the boiler room, there’s a Manikin hiding behind the electrical unit in the middle. There’s also some ammo on the toolbox in the corner.
Boiler room 2
Boiler room 2 has a boiler on the left and right, there’s a Manikin hiding in front of the boiler on the left. The gas can is in the back right corner on some wooden pallets.
Laundry Storage Room
There’s a note on the bulletin to the left of the door as you enter about excessive bleach use and a rolling cart in the back.
Laundry Room
There’s a Manikin hiding in front of the steel shelf on the left and there’s some ammo in one of the lockers on the right. There’s also a cutout high on the left wall as you enter so go back into the laundry storage room and get the rolling cart. Wheel it under the cutout so you can climb up the cutout.
Storage Room
When you climb through the cutout and jump down Maria nervously asks where he’s going and as James lands he tells Maria not to worry he’ll be right back. There’s a first aid kit on the one of the shelves on the right, a construction blueprint of Brookhaven Hospital from 1932 to the left of the door as you enter and some ammo on the steel shelf in the front left corner. The fuel tank is on the back left corner when you click on the white dot your gas can will show and when you select use a cutscene will start showing James filling the gas can. When the cutscene ends and you’re back in control unlock the door and head back into the hallway where Maria will be waiting. Before you go back to the generator room go to the end of the hall to the right and take out the Manikin hiding behind the lockers, then get ready for two more to come from the hallway to the left. Before you leave don’t forget to check the end table at the end of the hall for ammo. All together there are about 8 Manikins in the basement. When they’re all dealt with return to the generator, when you click on the white dot on the funnel a cutscene will start showing James filling the generator when he’s done the cutscene ends and an auto-save occurs. When you’re back in control flip the switch to start the generator, the lights will come on an Maria will exclaim “Yes! You did it” and suggests checking the elevator. So start making your way back out, when you get to the hallway a door on the left that was locked before is now open and you can just make out the figure of a crawler up by the elevator. Shooting it should cause it to come crawling at you so you can put the boots to it. In the room that was locked before there’s some handgun and shotgun ammo. Go into the elevator and up to the second floor, when the elevator arrives on the second floor a cutscene starts showing James walking out into the hallway looking to the left and right stopping on the right looking at a broken window. James then turns around to find Maria leaving against the wall, when he approaches and says her name sh go into the room without saying anything. James follows her into the room and asks if she’s ok, Maria sitting on the bed apologizes and after some back and forth Maria says it’s probably just a hangover. James suggest taking a rest so she takes some painkillers and lies down, James says he’s going to look for Laura and will be back as soon as he can. As James is leaving Maria asks what will he do if he can’t find Mary? He says he hasn’t really thought about that and the cutscene ends and an auto-save occurs.
Starting in the hallway outside room C5 where Maria is sleeping the next room that’s open is C3 and the restroom.
Room C3
The door room C3 is ajar, inside is a manual save and a health drink.
Restroom
The restroom is the next room up from room C3 inside there’s some ammo in one of the stalls.
Room C2
Room C2 is around the corner from the elevator just before the double doors that lead to the Directors Office. Inside there’s ammo in one of the end table drawers. I looked at the clock and if I remember right that’s the time you need to set on the clock puzzle in the Blue Creek Apartments.
The section of the second floor where the directors office is located is not open at this point so make your way back down the hall to the other double doors across from where Maria is taking a nap.
Once you’re through the doors into this new section you’ll see sparking up ahead, don’t worry about that, it’s a malfunctioning elevator, get ready to take out your first Bubble Head Nurse. She’ll come slowly into the room from the hall on the left, and will come at you once you shoot her. Try for head shots, three should take her down, I did a very poor job on my first Bubble Head but it’s not all my fault the character James is a lousy shot, take out your pistol somewhere safe and see how much the reticle drifts from side to side and up and down.
In the waiting area in front of the Nurse Station on the north wall there is a first aid kit with a health drink inside. To the right of it the wall has a narrow opening at floor level leading to room L3 and it’s observation room. Be ready as you crawl through, there’s one Lying Figure, one Crawler and one Manikin. There are beds around the room and handgun ammo in one of the end tables and shotgun ammo in another. The Observation Office is at the back of the room, when you enter you’ll hear distorted dialogue coming from the radio on the window ledge. There’s a photo titled “Her Drawings” on the desk and a health drink in the cabinet to the right. Back in the big room you can get out through the double doors that unlock from the inside.
There’s a note on the Nurses Station window pointing you to the Doctors lounge to look for the keypad combination. The double doors that lead to the Directors Office section of the second floor are open and just on the other side on the left is the laundry room and inside there’s a carbon copy of something in the trash can beside the desk and some shotgun ammo across on top of the trash can beside the sink. Back in the hall through the rounded opening is the Directors Office, to the left are the double doors that were locked on the other side but can be opened from this side, which is what I did and then ran back to the manual save.
Just on the other side of the double doors across from the stairwell in the southeast corner of the map is room C1, inside on the left wall is a crumpled poster marked with a white dot. When you click on it a short cutscene will start the poster falling to the floor and a wrinkled piece of paper in James’ hand. The paper is an interview transcript talking about the pool, when the cutscene ends James will update the map.
Across the hall is the shower room, which I missed in this video, there’s one Manikin hiding behind the sink wall and some handgun ammo one of the lockers in the front left corner. There’s a door along the back wall that leads to room L2 which is a fairly large room with beds along the walls. To the left of the door is a Manikin hiding behind the storage cabinet so unless you know it’s there you won’t notice until it jumps out at you, there’s also one Lying Figure somewhere in the room. There’s a health drink in the cabinet in the front left corner and some handgun ammo on a stool in the front right corner. The door along the north wall leads the nurses waiting area.
The Directors Office.
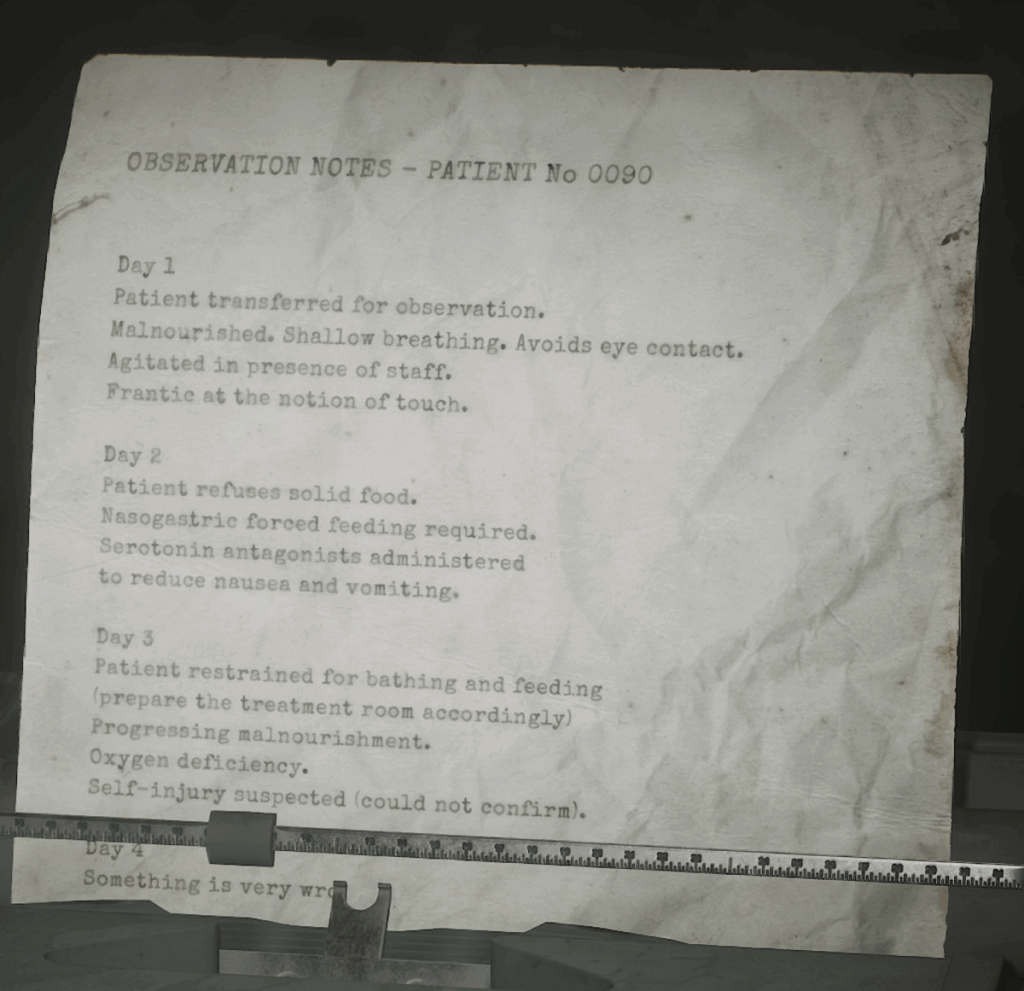
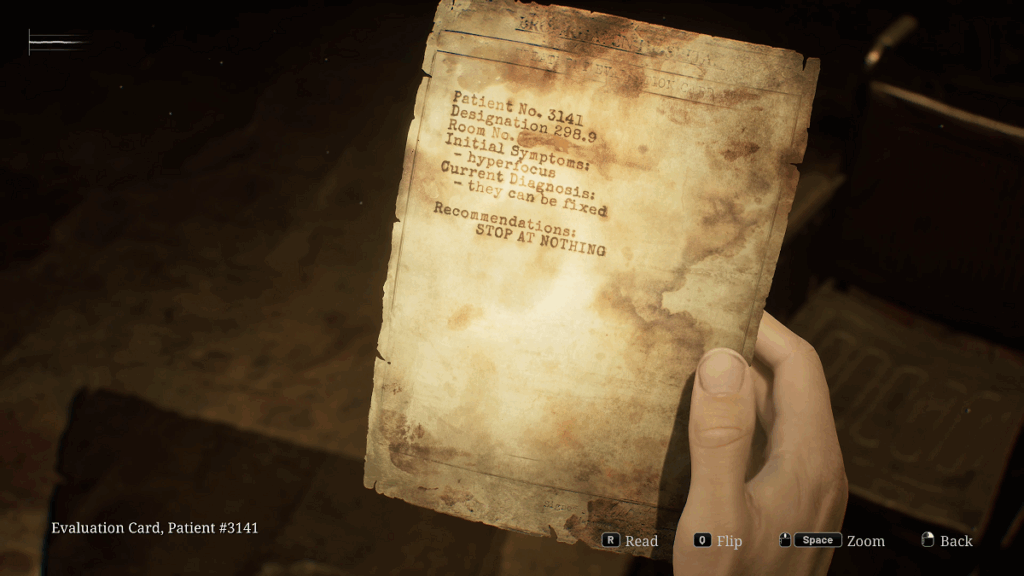
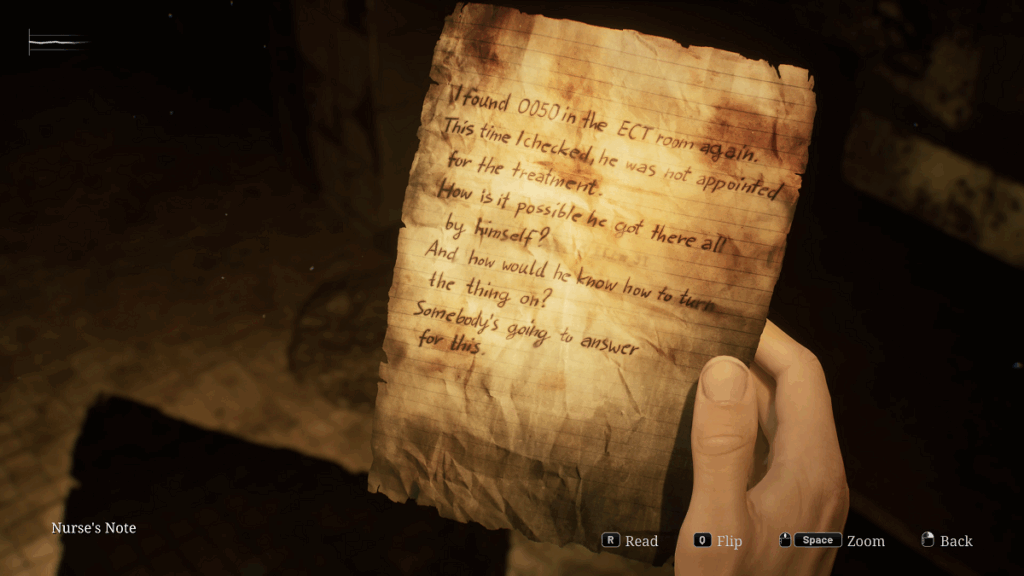
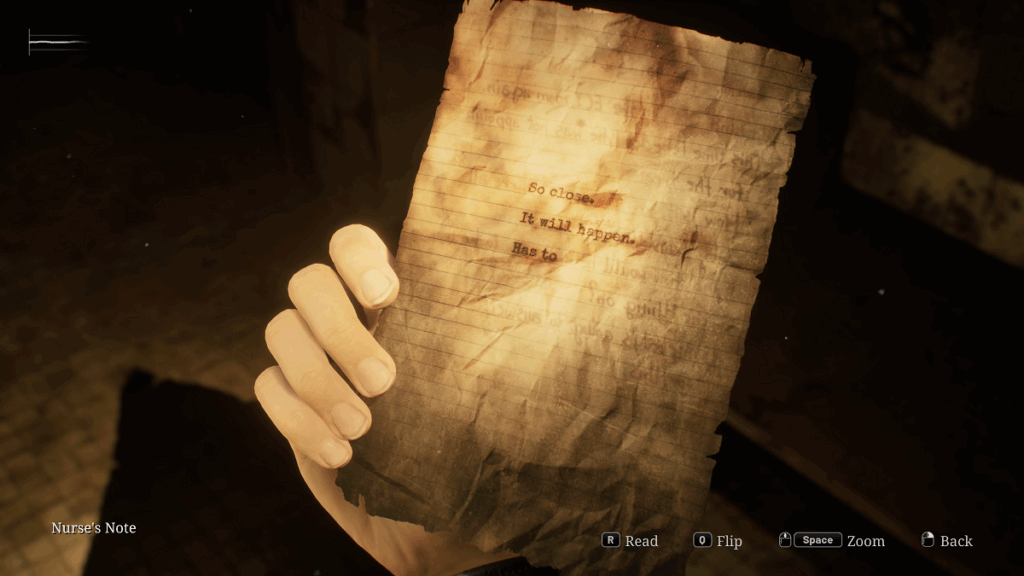
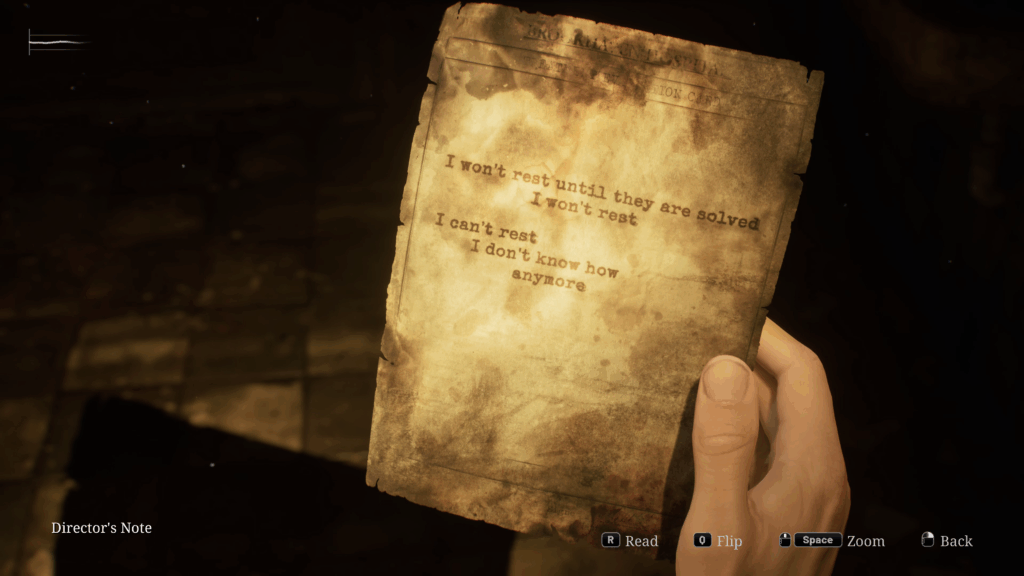
The directors office is the second door down from the double doors in the southeast corner, it has two wooden doors and as soon as you enter you’ll notice a arm sticking up from the desk clutching a key. You’ll need to find three wristbands and then arrange them in the proper order to release the key from the hands grip. The tape recorder on the table with the lamp to the left has a recording of the Director saying he’ll do whatever it takes to cure the three patients. To the right of the desk on the counter there are evaluation cards for the three patients which I’ll include as pictures here.
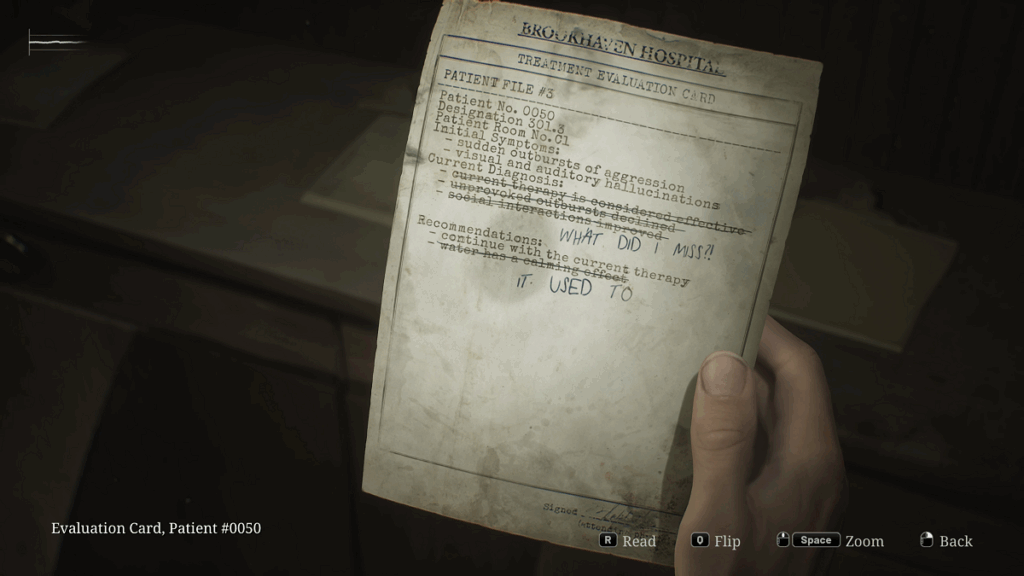
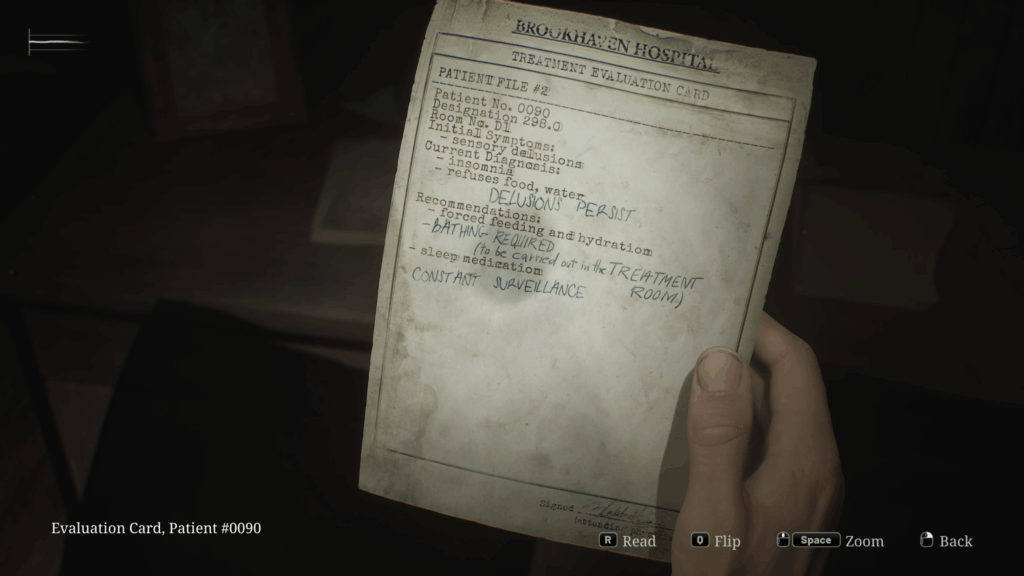
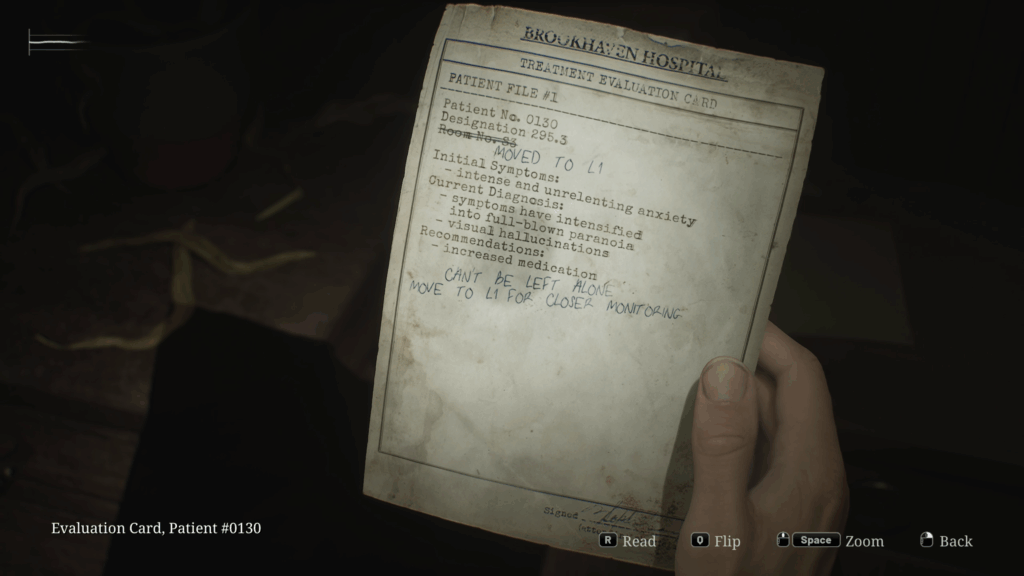
After you finish looking at them James will update the map. To the right of the entrance is a small office, on the table is a manual save and on the left a door that requires a key to open, the key that’s in the hand on the Directors desk. To the left of the Directors desk is an open doorway with a curtain concealing something, when James gets close a cutscene will start showing James moving the curtain to one side. Behind the curtain is a safe with a sophisticated locking device which consists of 6 numbers with 9 symbols to choose from, but there is one tile missing, so in your travels you have to located the three wristbands and the missing safe tile.
Back in the hallway head left, after a few strides a light down the hall will come on illuminating a Bubble Head Nurse shuffling your way, you’ll have plenty of time to take it out before it gets to your position, although I didn’t come out of it unscathed.
Restroom
There’s a restroom across from the Directors Office, inside there’s some handgun ammo on the counter. No enemies in this room.
Room M5
Room M5 is across the hall from the restroom and down a little, inside there’s some handgun ammo in one of the end table drawers. There are no enemies in this room.
Room M1
Room M1 is down at the end of he hall on the right, the door is ajar and inside there’s a hospital bed with lock an chain and marked with a white dot. When you click on the white dot you’ll get a view of James standing by the side of the bed his light shining on the lock that’s separate from the chain.There’s some shotgun ammo in the drawer of the little table to the left of the door and there are no enemies in this room. Before I left the room I demonstrated how much the reticle of the pistol moved even though I was staying still.
Head back up the hallway and take a left, on the right is room L1 but the door requires a key to open.
Women’s Locker Room
The women’s locker room is across room L1 and just down from the men’s locker room, the door is ajar and inside on the table on the right is a first aid kit with a health drink inside. There’s some handgun ammo in one of the lockers along the right wall and the shotgun in one of the lockers along the wall across from the entrance with some ammo on the table to the right. I ADVISE NOT USING THE SHOTGUN UNTIL THE BOSS FIGHT THAT COMES NEAR THE END OF THE BROOKHAVEN HOSPITAL.
In the back left corner a teddy bear marked with a white dot, when you click the white dot a cutscene will start showing James picking up the bear and pricking his finger on something, he turns the bear around and removes a bent needle from the back of the bears head. You’ll need this later on. There are no enemies in this room.
When you exit the room there will be a Bubble Head coming your way so again you’ll have time to take it out before it gets to you if you can head shot it three times. I didn’t do it and I used more ammo than I wanted but I put it down without taking any damage.
The Nurses Lounge
The nurse lounge is down from the women’s locker room in the northwest corner of the floor. There is one Bubble Head Nurse hiding in the bathroom to the left of the entrance. I took it out but not without taking damage, they are difficult to take out especially when you’re dealing with them in tight quarters. The key to room L1 is on the table in front of the T.V.
Room L1
Room L1 is back up the hall across from the men’s locker room. There are no enemies in this room, in the front right corner there’s a rolling cart, behind the cart there’s some handgun ammo in the end table drawer. Wheel the cart over to the other side across from the entrance, at ceiling level there’s a rectangular hole that you can climb through. It leads to a small office with a report on the desk about a girl that they brought in, Laura maybe. One the right side the window is missing so you can jump through to the other end of the room. From there go left through the open doorway and down to the end of the hall, there’s some handgun ammo in the end table drawer. Back track and go into the room on the right, there’s a hole in the wall across from the entrance at floor level with Manikin hanging down, shoot it! The hole is marked with a with dot, when you click on it a cutscene will start showing James looking into the hole and then crawling backwards into the hole. He falls all the way down when the rungs of the wooden ladder break, the place where he lands just happens to be where there’s a hole but it’s covered with a locker. James pushes the locker over and climbs out and the cutscene ends. James is now in a utility room, on the first floor, with a space at floor level that leads to the Medical Records.
Medical Records Room
On the left there is a typewriter marked with a white dot, when you click on it you get a closeup view but it’s unclear what the significance of this typewriter and the stuff around it is. At the start of the shelf on the floor is a note marked with a white dot, this one reads “Why won’t they help me why do they keep me in here with him”. In the middle of the room is a first aid kit with a health drink inside and in the back right corner under a hanging sheet is a brown book marked with a white dot, when you click on it James picks up a wrist band, one down two to go. When you’re finished looking at it you’ll hear some noise behind you and a cloud of dust, there were boxes blocking the exit door and a Manikin has come in knocking the boxes over. The Manikin is hiding behind the shelves to the left of the entrance, three shots will is all that’s needed to take it out from a distance. When it’s dealt with open the door and you’ll exit across from the Reception Office where there’s a manual save.
My intention was to explore the pool but when I got there I discovered it was lock so the inner court key is needed to access the pool.
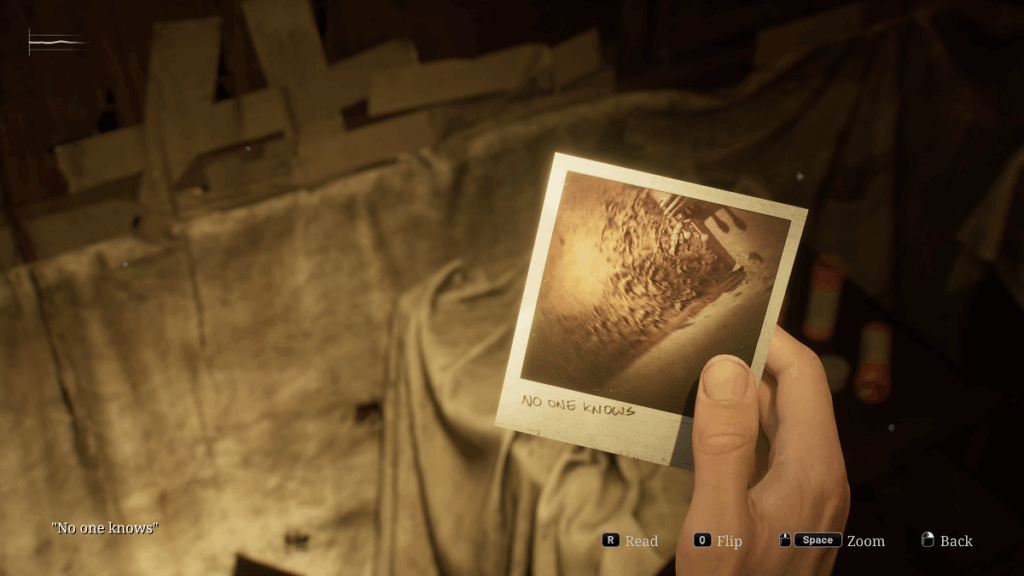
On the way to the pool just past the lobby there was a door ajar that was locked before, inside in one of the desk drawers is one of those strange photographs, this one is titled “At least she was there”. There’s also some handgun ammo in the wall cabinet along the opposite wall. Your map will be updated showing the way is blocked after you try to go to the pool so make your way up to the third floor, I used the elevator to get to the second floor then the stairwell in the northwest corner of the floor. On the way to the stairwell there’s a shower room on the second floor that I covered in an earlier post.
When you get to the stairwell before you go up to the third floor go down first and pick up the handgun ammo on the little end table. At the top of the stairs on the third floor go right and click on the white dot on the door with the restricted area sign on it, when you do the little door will slide to the side giving you a look into the ward on the other side. Laura is drawing on the wall and when James calls out to her she runs away. To the right of the door is a manual save, so save here before you explore the rest of the floor.
From the top of the stairs on the third go left, the static from your radio will increase, as you round the first corner you don’t see anything yet you know that there’s something there, when you round the second corner you discover a Bubble Head Nurse shuffling toward you. Head shots are the most effective needing three to take them out, I still have to come to grips with the aiming and so I didn’t score any head shots but I did take her down without taking any damage. On the window ledge to the left of the corner is some shotgun ammo, the stairs to the right go up to the roof but a key is required. The room with the double doors is room D3
Room D3
There is one Bubble Head Nurse and some handgun ammo in one of the end table drawers.
Room D2
Room D2 is located up the hallway that the Bubble Head Nurse came down, it’s the first door on the right. Inside there’s a desk with a typewriter on it with a letter that’s partially typed which is displayed below.
Across the hall are Exam room 4 and 5 with X-Ray at the back and Room D1 which is the next room up the hall has a combination pad lock on the door. To get into the Exam and X-Ray rooms break the window beside Exam room 5 entrance door.
Exam Room 5
The key to the inner ward on the firs floor is on the desk which gives you indirect access to the pool also. The door to the X-Ray room is ajar, inside there are a couple of X-Rays on the viewing screen and a note on top of an X-Ray on the table, one of the X-Rays is missing . Take the X-Ray from the table and put it onto the screen, rearrange them so the magic marker witness marks line up, when they’re in the right position a number four stands out. This is one of the numbers to the combination pad lock that’s on the door of room C1, there’s one more X-Ray that’s needed to get the other 2 numbers. The door to Exam room 4 is ajar, inside is a first aid kit on the wall with one health drink in it. The door to the hallway can be unlocked from the inside and it exits right across from room C1 but with only one number it’s back to the manual save to regroup.
Starting from the Registration office head out into the lobby, watch for Bubble Head Nurses I ran into one coming in the front doors, luckily there was a moment where her head was glitching and I was able to knock her down and finish her off with my melee weapon. When the way is clear head down the hall to the inner ward, it’s across from the main entrance and the hallway is slightly lit up so that you can just read “Inner Ward” above the double doors.
The Inner Ward.
As you enter the inner ward look to the right, the hallway will be dimly lit but you can just see a Bubble Head Nurse down by the double doors. You can get a little closer in the hallway on the left and wait for her to start having a head shaking fit and sneak up from behind to take her out with the melee weapon. I just walked up behind her hit her three times with my melee weapon then shot her three times and finished her off with a couple of more hits. After she’s down you should go the double doors and unlock them from the inside. There’s also a Lying Figure roaming around so take it out before moving on.
The Doctors Lounge
The doctors lounge is the first door on the right when entering Inner Ward through the double doors that you just unlock. Inside there’s a note on the coffee table on the left, this is it below
At the other end of the room on the bulletin board on the left is a note, it’s a drawing of the keypad combination for the Nurse Station on the second floor so the combination is either 8753 or 3578. In the locker room at the back of the lounge there’s a health drink in one of the lockers. The locker room exits at the entrance doors to the Inner Ward.
Back in the Inner Ward at the end of the long hallway on the right, when your going into the Inner Ward from the Doctors Lounge, there’s some handgun ammo. Across from the double door entrance that comes from the lobby are cloth covered doors which are partially open. this is the Day Room
Day Room
Inside the Day Room everything seems to be covered with sheets, have your pistol ready for the Bubble Head Nurse on the left. As far as loot goes there on some handgun ammo in the cabinet with glass doors in the back middle of the room. In the back left corner there’s a hole in the wall that leads to the pharmacy.
The Pharmacy
Inside the pharmacy at the back of the room there’s an open window that leads out to the garden, beside the window there’s a cabinet with a health drink inside. In the front right there’s a drain marked with a white dot, when you click on it you get a view of something stuck in the drain and your inventory opens, but you don’t have anything at this point to retrieve whatever it is in the drain. On the table is a bloody book, here it is below.
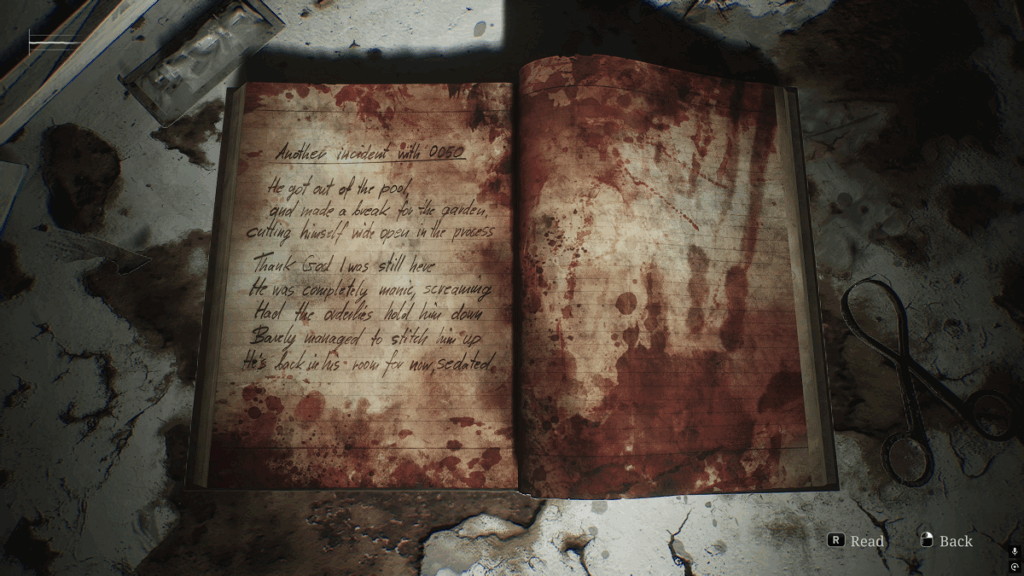
From this note you can deduce that you can get into the pool building from the garden, but I didn’t want to go there yet with the rest of the Inner Ward still to explore.
Exit the pharmacy to head right, at the corner there’s the stairwell that goes up to the third floor as you go by it unlock it. Beyond that the hallway turns left, around the corner is a Bubble Head Nurse, carefully take her out. Next on the right is a restroom with the door open, no enemies and some handgun ammo on the window sill. Moving on from there on the corner where the hallway turns left is the pantry.
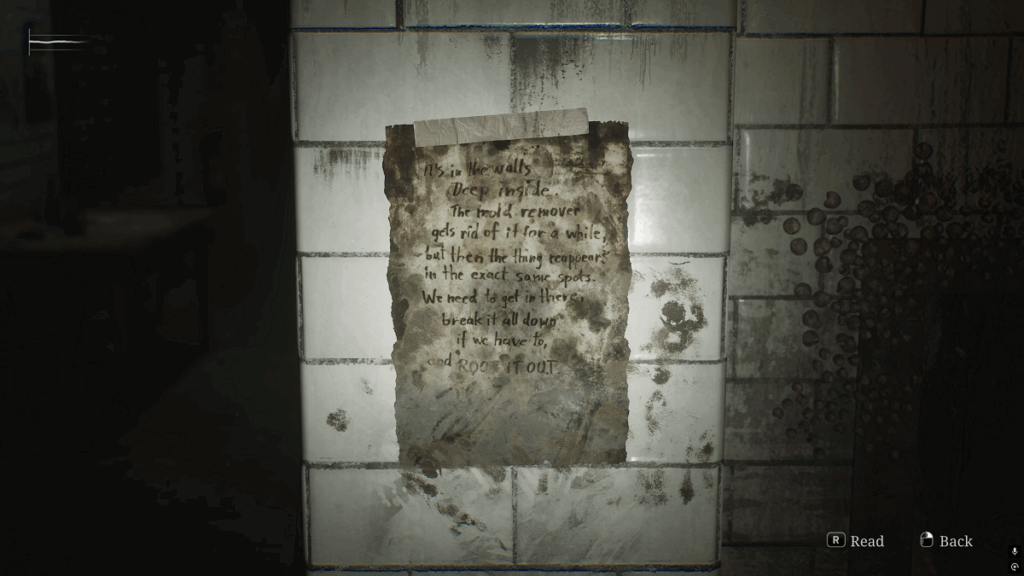
The Pantry
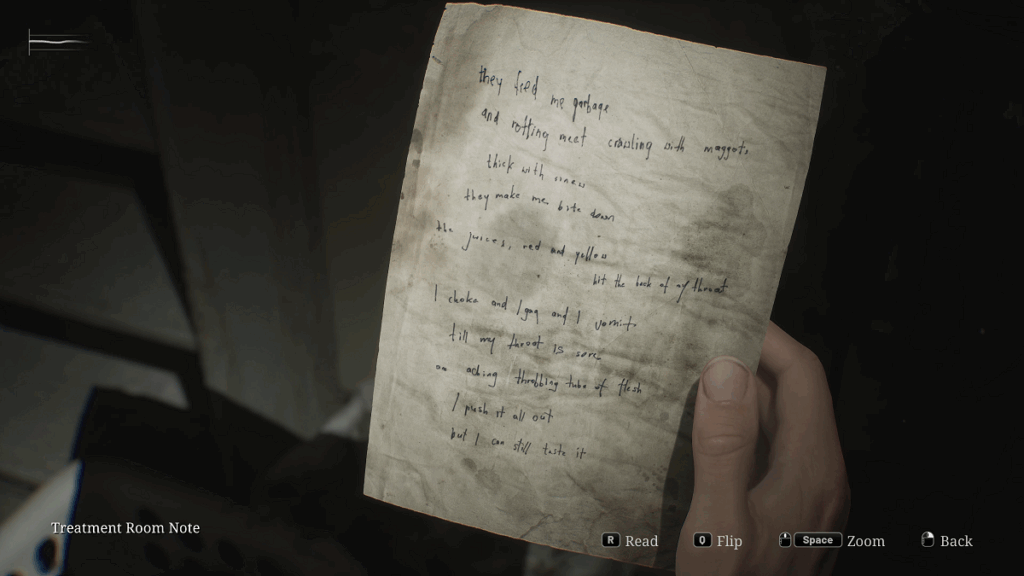
Inside the pantry along the outside wall on the left is the garbage shoot that’s crawling with bugs, sitting ledge is a spray bottle marked with a white dot, when you click on it you discover it’s mold remover, you’ll need this later. As you enter the pantry you’ll see another Bubble Head Nurse going by in the hallway, it’s better to go back to the door that you came in and enter the hall there then look for the nurse. I was a bit lucky this time I got three head shots. Beside the garbage shoot in the pantry is this note
Next to the pantry is the kitchen which is off of the cafeteria. There is one Bubble Head Nurse and one Lying Figure in the cafeteria. When they’re both down go back behind the counter and pick up the shotgun ammo in one of the drawers, if you can. There some shotgun ammo back in the hall in the restroom on the right and some on a chair in front of the T.V. When you’re done in the cafeteria exit through the double doors that can be unlocked from your side and head into the Registration office and the manual save and get ready for the next part.
Make your way to the Pharmacy on the first floor, the back window is open allowing you to jump out into the garden. Outside it’s dark and raining make it very difficult to see, there are three Lying Figures and two Manikins roaming around the garden. In the northwest corner there’s a tool shed, the door is locked but there’s an opening at ground level to the west side. Before you crawl in have your pistol ready and reloaded and your flashlight on. As soon as you are able to stand move to the right and look to the left for the Manikin, the reward for surviving is some handgun ammo and a first aid kit with a syringe inside, both of them sitting on one of the benches. There’s more ammo on one of the tables just outside the Greenhouse.
The Pool
There’s an open window in the greenhouse that you can jump through to get into the pool building. The pool area does not have any enemies, on the bench along the right wall there’s some handgun ammo, in the front left corner there’s a cover on the floor but it’s locked. The restroom and shower are at the front of the pool building you’ll hear static from your radio as you enter this area, it’s because there’s a small crawler on the floor and there’s also a Manikin hiding in the shower to the right. The restroom is on the left and inside on the sink is some medical tube, when you pick it up it just says Medical Tube but if you exit and then go back into your inventory and select the Medical Tube you’ll be given the option to combine it with something. I show this in the next video. In one of the lockers there’s some shotgun ammo and on the bench to the right is some handgun ammo but if you didn’t take out the Manikin before it will spring out and surprise you like it did to me. The door to the Inner Ward is unlocked from the inside so that gets you back out instead of having to go through the garden and Pharmacy. From here I went to the second floor Nurses Station because when I went through the Doctors Lounge I found the combination to the keypad.
Nurses Station
The waiting area outside the Nurse Station is dimly lit making it difficult to see but when you get closer to the station your flashlight will improve things. At first there’s one Bubble Head Nurse and when I got there she was having a head shaking fit, but when I hit her she didn’t go down and what made matters worse is a second Bubble Head Nurse came out of the storage closet. I eventually got free and made a hasty retreat and used my pistol to take out the first one but the second one just didn’t want to die and by the time she did I was in need of a health drink. In the storage closet that the second Bubble Head Nurse came out of are both kinds of ammo, handgun ammo on the shelf across from the door and shotgun ammo in the end table drawer to the right.
The Nurses Station
The piece of paper that was on the bulletin board in the Doctors Lounge is shown below.

So the numbers are either 8753 or 3578, the latter is what worked for me. There are not enemies in either room so you can explore with your mind at ease. Inside in the one of the desk drawers on the left is some handgun ammo. Connected to the Nurses Station in the rear is the Treatment Room, inside to the left there are three bath tubes crawling with bugs and to the right on the wooden bench this message
The bath tube on the right is marked with white dot, when you click on it James picks up the missing Moldy X-Ray. When you’re done looking at the X-Ray suspenseful music plays and it sounds like something is getting rearranged, what it was is a mystery. Now that you have the missing X-Ray head back upstairs to the X-Ray Room, the stairs are just outside the Treatment Room exit.
X-Ray Room Second Visit
Before you put the missing X-Ray onto the screen you have to clean it, to do this go into your inventory, first select the X-Ray and select combine it with the mold remover spray bottle that you go from the pantry and it will result in a clean X-Ray. Now put that on the screen and line up the witness marks, when they’re lined up right a crude 4 37 12 will stand out. When your done looking at it James will make a note of it on the map. Now exit the X-Ray room and go across the hall to Room D1.
Room D1
I initially got the number wrong and after multiply tries I decided to look at the map, also I start turning the wrong way. The right combination is 4 37 12, so turn the dial clockwise until you get to the 4, then counter clockwise until you get to the 37 and finally clock wise until you get to the 12. If you did it right the pad lock will disappear. Inside there are bugs crawling around everywhere, the hospital bed to the right is marked with a white dot and when you click on it a cutscene will start. The cutscene show James pulling the sheet off the bed and finding a pile of repulsive remains underneath, in the middle of the remains is a filthy wrist band. Now two of the three wrist bands are found, you can either continue on looking for the last one or head the manual save and regroup.
There is something in the Pharmacy drain and you need to combine the medical tube with the bent needle to fish it out. Now when you found the bent needle or the medical tube James picks it up and you get a close up of that item, at the time there’s nothing to make you think that I have to combine this with something. So whenever you find a new item exit out of the closeup and then go back into your inventory and look at the item again if it has to be combined with something to combine option will appear above it. Having said all that go into your inventory and combine the medical tube and bent needle, where they’re combined you’ll get a closeup with the title medical tube with bent needle attached. Now go over to the drain and click the white dot and select medical tube, when you do a cutsccene will start showing James lowering the tube into the drain and pulling out a key. The key is a maintenance key and if you look at it in the closeup you can see the word pool on it, and it looks like it has an ear key chain. To get to the pool from the pharmacy exit into the hallway, turn left and it’ll be the last door on the left before the double doors.
The Pool
Make your way into the pool building and to the locked cover in the front left. It’ll be marked with a white dot and when you click on it your inventory will open showing the key, select the key and a cutscene will start showing the door swinging open and a valve opening. The cutscene ends and by the time you turn around the pool is almost drained, go into the pool. There are three Lying Figures on the on the pool floor but none of them made a move while I was down there so I think it’ll be the same for you. Go to the front of the pool and break the wall, James will pull out a blood stained wrist bracelet and with that all three are now found.When you get out of the pool one Lying Figure will be there to great you, you know what to do. Now make your way to the Directors Office on the second floor. On the way I stopped to check on Maria, when you interact with Maria a cutscene will start, they have a short conversation with Maria saying she needs just a little more rest, the cutscene ends and you’re back in the hall.
The Directors Office
In the Directors Office solve the hand puzzle first, there are three wristbands that have to be placed on the hand puzzle in the correct order. The three wristbands are labeled Blood Stained, Filthy and Marked so the top wristband is the Blood Stained one, the middle wristband is the Marked wristband and the bottom is the Filthy wrist band. When they’re in the right order the hand will open and the numbers 92 45 71 are line up on the wrist bands, this is part of the combination to the safe. The key will open the Directors storage room which is in the little room on the right.
Directors Storage
Inside on the table to the left is the missing safe button and on the right there’s a row of books that have to be rearranged so that a picture of a fire breathing lion. It’s a little bit awkward moving the books around because you can only replace on with another but it’s not that difficult and when it’s done the symbols on the books will line up the the numbers the book end, and James will make a note of it.
The Safe Room
The first thing to do is install the missing button in the row of symbols then onto to opening the safe. The confusing part is that there are nine symbols but only six numbers in the combination and the order of the symbols is not the same on the safe as they are on your map. You have to refer to your map and ignore the symbols on the safe, the correct order is shown below
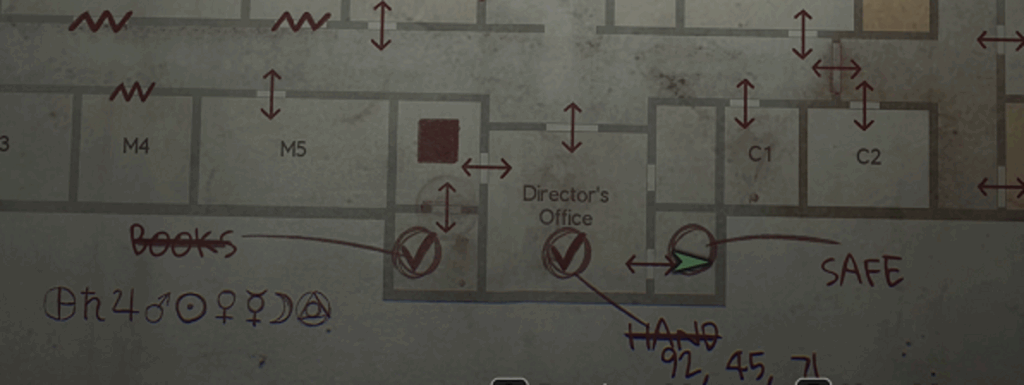
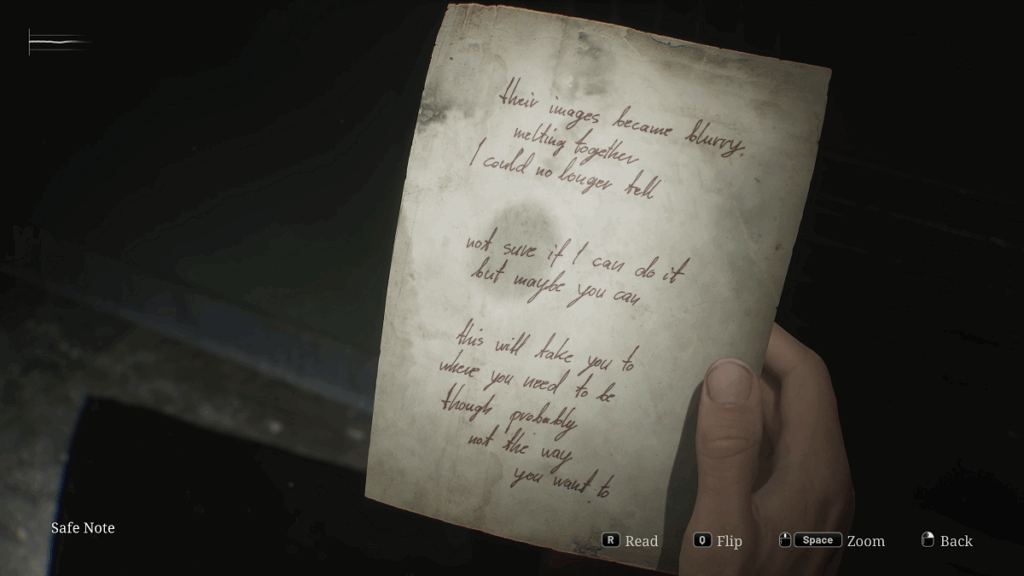
The first number is a nine which corresponds to the circle with a triangle with a smaller circle, the second number is a 2 which corresponds to the H with the plus mark. The third number is a 4 which corresponds to the male symbol. The fourth number is the 5 which corresponds to the circle with dot in center. The fifth number is a 7 which corresponds the female symbol with an arc on the top. The last number is the 1 which corresponds to the circle with one vertical line and a line to the right. When the safe opens James grabs the rooftop key from inside and an auto-save occurs. There’s also this note in the safe
So after taxing my brain I used the manual save in the small office to regroup before going up onto the roof.
After you crack the safe open you’ll get the rooftop key, access to the roof is on the third floor in the northwest corner, a couple of flights and you’re there. It’s dark and raining but you can explore the rooftop without worry of being attacked there are no enemies on the roof. There are a few elevated walkways on the roof, there’s some shotgun ammo on the back right walkway and on the walkway that’s to the left of the entrance there’s a section of railing that’s marked with a white dot, when you click on it you get a closer view of broken chain link fence accompanied by eerie music. And that’s all that’s on the roof .
Elevator Cable Building
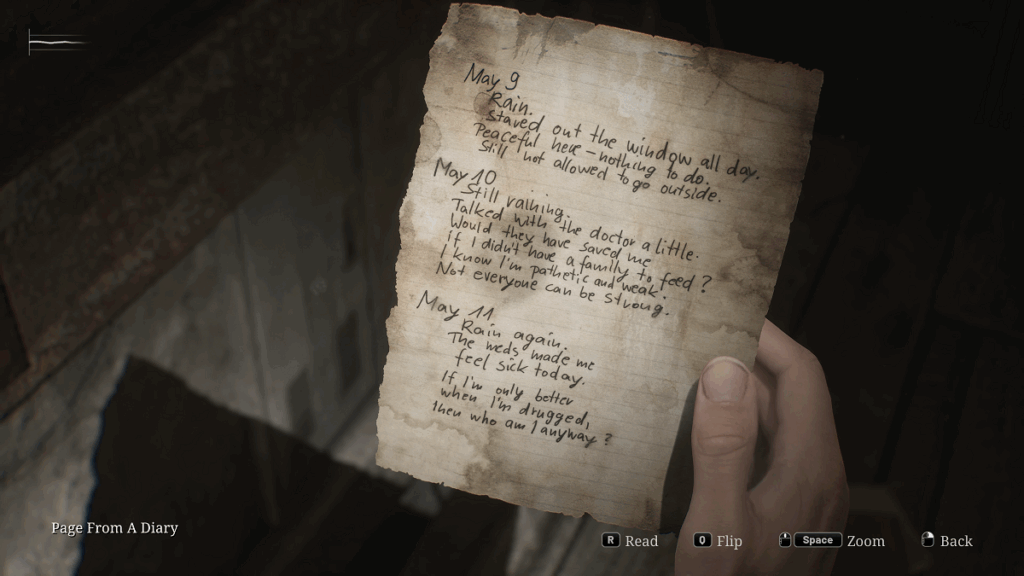
There are no enemies in the cable building, the door on the left is locked and on the floor are these two pages from a diary
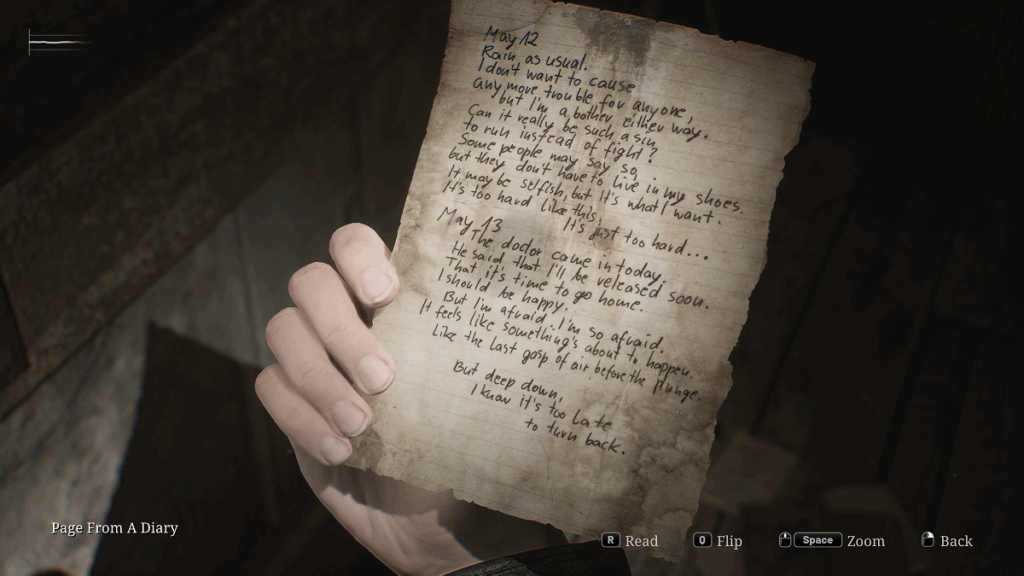
When you are finished reading exit the building, when you do you’ll be met by our old friend Pyramid Head but don’t worry you don’t have to fight him. A cutscene will start showing him grabbing you by the throat and throwing you back into the cable building, when you land you’ll break through the floor, Pyramid Head comes to take a look at James lying on top of the elevator. With some difficulty James gets his bearing and climbs out of the elevator shaft into the Isolation Ward. The cutscene ends, you’ll be on the other side of the door that you looked through when you saw Laura drawing on the wall and an auto-save occurs.
The Isolation Ward
There are no enemies in the rooms in the first part of the Isolation Ward.
Head around the corner to the left, the first door on your left is the Hydrotherapy Room, inside on the filing cabinet to the right of the entrance there’s some shotgun ammo, on the desk to the left is a first aid kit with a syringe in it and in the cabinet in the corner there’s a health drink. On the other side of the room in the front left corner in the end table drawer some handgun ammo, so there’s a little bit of everything. The door on the back wall opens to the side that you came from, so this is you’re last chance to access the Brookhaven hospital.
From the Hydrotherapy Room continue down the dimly lit hall way, along the way you’ll pass three padded cells. The first and third cells are open, there’s nothing in the first cell and in the third a section of wall marked with a white dot, when you click on it you’ll get a closer view of bloody question marks accompanied by eerie music. Continue around the corner to the right and through the double doors, when you enter the hallway on the left a cutscene will start showing James slowly entering, flashlight in hand. He comes into the room where Laura is playing, they have a conversation about Mary and how Laura knew her name. Laura asks if James will yell at her if she doesn’t tell him and James says no he won’t and as soon as Laura starts to tell James that they met is the hospital James yells at her to stop lying. This causes Laura to get mad and run out of the room, James catches her in the hall and tells here she shouldn’t be running around along that it’s too dangerous. Laura agrees to go with James but she wants to get a letter from Mary that she hid in the other room. James agrees and goes in the room to get it for her, when he’s in the other room Laura locks the door and won’t let James out as say seeya fart face and runs away. James is left to deal with whatever is in the room with him, the cutscene ends and an auto-save occurs.
Flesh Lips Boss Fight.
It turned out that I was now in a Boss fight something I didn’t expect so I went into this blind and made it through the first time, I guess sometimes it’s better not to know what’s coming.
Your first look at Flesh lips is right after the cutscene ends, it’s hanging from the ceiling by one arm and it’s encased in expanded metal with two legs sticking out the bottom. This is where you are going to use the shotgun and your pistol and your melee weapon. Dust will falling everywhere it’s moving in the ceiling so you’ll have an idea where it is. It drops down and swings at you trying to hit you with two legged kicks and then go back into the ceiling. Aim for the hand that it’s hanging from to get it to fall to the floor, then it’s a matter of hitting it with everything you have while trying maintain a safe distance. I suppose I got a little lucky when at one point Flesh Lips got stuck in the corner and I hit it with 10 handgun shots. Eventually the wooden wall will be destroyed giving you more room to run around, there is some health drinks and ammo around the edges of the room. I got into trouble part way through trying to reload my shotgun and then shortly after that after some melee hits it keeled over and the fight was over. A cutscene will start showing James slowly approaching the fallen foe to take a closer look and then out of the ceiling a second Flesh lips grabs James by the head and pulls him into the ceiling. At this point you’ll get the Nightmare Fuel achievement while you slowly fall down, Mary calling you a few times into the other world, James crawls to his feet disoriented and somewhat beat up, an auto-save occurs and the cutscene ends. You end up on the first floor just outside the Day Room, I started with 14 shotgun shell and after the fight I had 5 left, with the pistol I did slightly better starting with 64 and 58 left after. On the health side I started with 13 health drinks and 5 syringes ending up with 8 health drinks and 4 syringes.
The Day Room
In the Day Room in the right corner on a table there’s a first aid kit with syringe in it and some handgun ammo in the end table drawer to the left. There’s a wheelchair in the middle of the room with this report on the seat
The room exits through double doors into the hallway with a manual save to the left. This is where I stopped this time.
Mini map, mini map where for art thou mini map?
I don’t think it can be over stated that this game needs a mini map, if nothing else you won’t get lost.
Anyway here we are in the hospital that looks a lot like the Blue Creek Apartments on the first floor and there’s nowhere to go but up to the second floor. The elevator is down the hall across from the pharmacy which is locked for now.
The Second Floor
You arrive on the second floor by the Nurses Station and in the waiting are there is now a manual save on the north wall and a box covered with a cloth that has three chains attacked to it. The box is marked with a white dot and when you click on it a cutscene will play showing James pulling the cloth off of the box revealing three locking devices, at the same time an auto-save occurs.
Nurses Station, Storage and Treatment room
To the north of the box room there is this trio of rooms, they look very different with some walls being broken down. In the Treatment Room on a stool next to one of the bath tubes is some shotgun ammo. Next in the Nurse Lounge there’s one Bubble Head Nurse and one Manikin, I tried approaching the Bubble Head with my flashlight off and although the Bubble Head can’t see you you can’t see her so it’s not very effective in a poorly lit room. I ended up turning my flashlight on and with 4 or 5 bullets hit her with three head shots. I didn’t see the Manikin that was hiding and took some serious damage, but just past that there is a first aid kit on the wall with a health drink. There’s another Bubble Head in the hallway to the left and although I tried to be careful it went very poorly so much so that I needed to use a syringe. Around the next couple of corner is the stairwell going up but I didn’t want to go there until I had finished exploring the second floor so I returned to the Nurses Lounge bath room. On floor level there’s a hole you can crawl through that leads to the women’s locker room, on the table on the left is a first aid kit with a syringe in it and in an end table drawer that’s in front some shotgun ammo. The doors can be opened from the inside and it exits into the hallway where the deadly Bubble Head was just moments before. On the way back I found some handgun ammo in the storage room beside the Nurses Station, on a shelf to the left and the cabinet with the glass doors to the right.
Second Floor Central.
Next I entered the hallway to the south of the box room into a rest room in front of the Directors Office. At the back of the rest room there’s a toolbox against the wall, above it there’s a hole that you can climb through leading to room behind the elevator. At this point I look at my map and I noticed that everywhere I went before was a darker color, but I didn’t notice this at the time. Anyway the room that’s behind the elevator leads to room L1, when you jump over you see yourself land and in the area to the left a Bubble Head Nurse. This area is completely dark which makes it uncomfortable relying only on the flashlight.
Room L1
When you enter L1 look to the left and you’ll see some handgun ammo on a table. The wall on the right is broken through into a small office where there’s a health drink to the left of the desk. From there I got lost my bearings and started going around in circles into areas that I had visited before. Now to get back out of this area exit room L1 by the south exit then enter room M4, from there room M5 and back into the hall. Turn right the enter the restroom on the left, exit the restroom by the east exit and go around to the left and you’ll be in the chained box room again.
Anyway after circling room L1 several times I left through the south exit and entered room M4, the walls between rooms M3, M4 and M5 are broken so you can go from one room to the next. From M4 and went into M5 .
Room M5
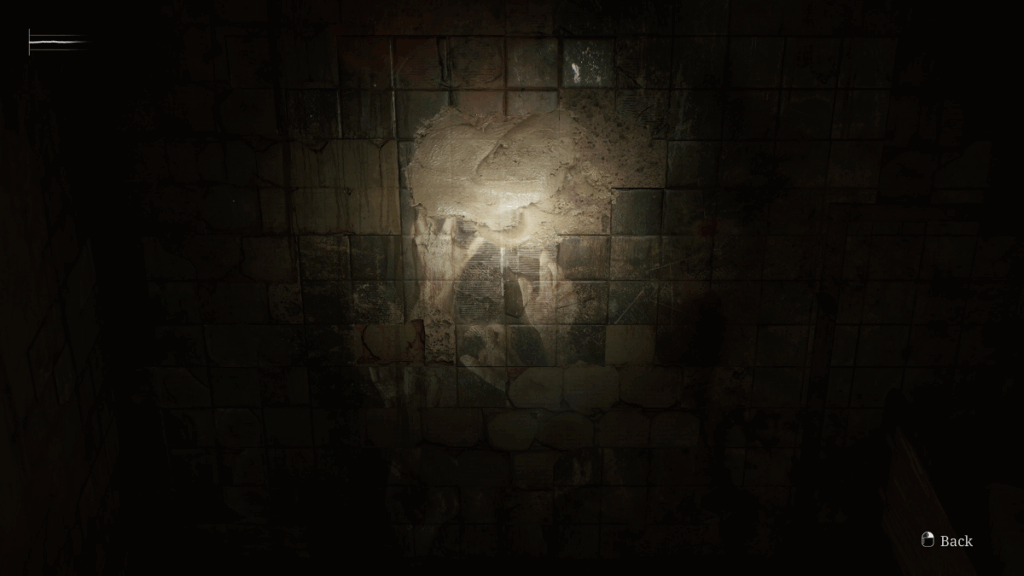
Inside M5 on the left on a cart is some handgun ammo, to the right of that a faint painting on the wall marked with a white dot. When you click on it you get a closer view of this picture accompanied as usual by eerie music.
From room M5 I entered the hallway and then the restroom on the left and back out to the chained box room.
The East Side Of The Second Floor.
Form the chained box room go left down the hallway, just before the corner on the left is a space at the top of the wall that leads to room L3 but you need something jump on to get over the wall. Around the corner to the right at the next corner a Bubble Head Nurse shuffles out of the restroom on the left. In that restroom is a first aid kit on the wall with a health drink in it. Around the corner to the right in room C2 there’s a Manikin crouched down at the end of the bed and Bubble Head Nurse will join the fight from the next room down the hall. There’s some handgun ammo it room C2 on the window sill and in the end table drawer. Across from the Directors office is a cracked wall that when broken leads to room L2 laundry room. From there I returned to the chained box room and went into the area that I was in at the beginning of the video. I have to admit this is not one of my better videos. This time I exited the restroom by the south door and went into room M5.
From room M5 make your way up to room M3 and break the wall, go through the narrow space into restroom M2. The door is marked with a white and when you click on it you’ll see into the next room where there is a clock on the wall that’s marked with a white dot. In the sink there are some pills, 6 to be exact and to the left on the floor is a page this calendar page
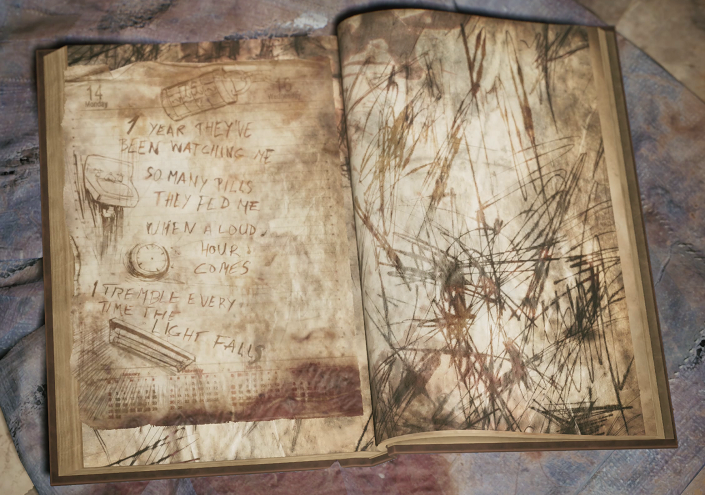
This page plus the number of pills in the sink and the hour on the clock are three of the numbers for one of the locks on the box, the only thing this page doesn’t tell you is how many pills were in the sink. Now go back into room M3 and then left into the hall and into room M1 the room you saw through the restroom door.
Room M1
In room M1 there’s some shotgun ammo on the window sill, to the right is a clock on the wall marked with white dot. When you click on the white dot and select use the bent hand gets straightened, next rotate it until it chimes. When it chimes two Bubble Head Nurses are released from somewhere and come into the room, I had to scramble first one went down and then the other but they both tried to get up again, in the end I had to use a syringe to keep from dying. When you’re making your way out there will be at least one crawler and one Manikin to deal with.
Starting from the chained box, this will be a lot more straight forward than the last video. First of all open the combination lock on the chained box using the information from the diary page which will give you three of the four numbers. Dial in 1622 and the lock will disappear leaving two locks to open. Head left or east down the hallway all the way to the Directors Office. Across the hall is a cracked wall that leads to room L2 Laundry. The crack leads to a small room with sinks to the right and part of the wall missing straight ahead which you can see a Bubble Head Nurse shuffling back and forth and a crawler somewhere in the bigger room. Shoot the Nurse a couple of time and then retreat back into the hallway and wait for the Nurse to come out, if she doesn’t come out repeat the process until she does. The Nurse didn’t come out the first time and when I squeezed back into the laundry room the crawler came slithering in which I made quick work of so that left only the Nurse to deal with. The Nurse came into the laundry to investigate the fallen crawler so from the hallway outside I got a least one head shot before I put some distance between me and Nurse. After I enter the laundry for the third time she finally came out and I shot her multiply times until she went down.\
Room L2 And Shower
To the right of room L2 is the shower, in the back right corner on a bench is some handgun ammo, a whopping 8 bullets. In L2 there’s a health drink in a cabinet with glass doors in the front right corner, in the back left corner is rolling toolbox. The exit back into the hallway is block by a big cabinet, you’ll have to push it out of the way and then wheel the toolbox out and to the right and park it under the opening that’s at ceiling height. The opening leads to rooms L3, Observation and C5
L3
Before you climb over the wall and jump into L3 have your pistol or shotgun ready and reloaded. As soon as land there’s going to be a Bubble Head Nurse and a Manikin to deal with, so move into the corner to the left where the sinks are and get ready to shoot. The Nurse will come at you from the front and the Manikin from the left side, if you can take out the Nurse quickly then you can run away from the Manikin and take it out on the other side of the room. In the back left corner in an end table drawer there is some shotgun ammo, and in the front right corner in the desk drawer is some handgun ammo.
Observation Room
The next room is the Observation room, there’s one Bubble Head Nurse shuffling around back and forth, try to lure her into the bigger room and take her out there, I got a couple of head shots but had to dodge out of the way and finish her off with my melee weapon. On the right on a bed tray there’s a note that says “He’s here again looking staring. He says he’ll drag me there, I don’t want to, I won’t let him take me”
On the right there’s a radio that you can hear yelling on and just past that on a book in front of the T.V is the key to the Directors Office. In the next room, which is room C5 , in the end table drawer is this photo
The door out can be opened from the inside so head down the hall to the Directors Office.
The Directors Office.
The Directors Office looks a little different, on his desk instead of a hand there’s now a ladder, to the left in the small room there’s some a health drink and some shotgun ammo in the cabinet on the left. The tape recorder on the coffee table plays a distorted recording I think it starts out with “We begin”. On the cabinet to the left of the desk is a note that says “There’ll be no pain anymore” The ladder leads up to Isolation Ward where the Flesh lips boss fight took place.
Isolation Ward.
At the top of the ladder is smaller room with a broken wall that leads to room 17. When you enter the room an auto-save occurs, on the left is a treatment stretcher connected to a control console. To the right of the door on the shelf is some handgun ammo and in the front right corner a first aid kit on the wall with a syringe in it. On the table across from the first aid kit is this note
The console has no power so you’ll need to venture out into the Isolation ward. Follow the red power cable out through the double doors, the cable runs to the left and goes through a screened opening so you’ll have to go around. There are two Bubble Head Nurses and on Lying Figure, the Lying Figure is across the hall in what used to be the padded cells but now all of the walls are gone and it’s one big room. Slowly move ahead and shoot he Lying Figure and then run back to the treatment room entrance, the Lying Figure should follow. If you don’t want to deal with the two Bubble Head Nurses, after neutralize the Lying Figure run into the room where it was, go to the left and jump through the open window. To the right is a narrow space you can squeeze through that leads to the generator room but before you go there go down the hall on the right and pick up the handgun ammo.
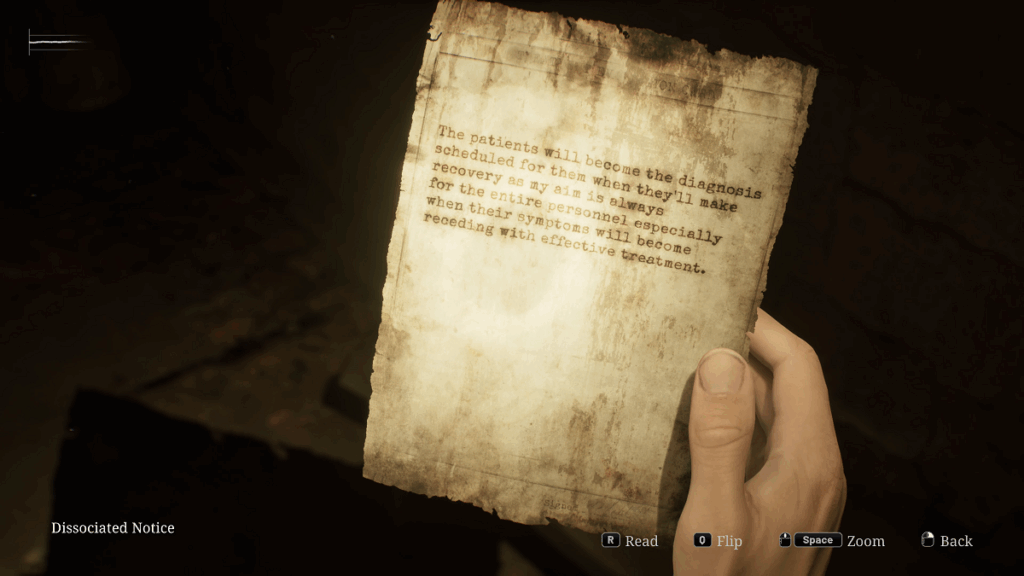
In the generator room there’s a first aid kit on the wall to the right with a health drink inside, on the left side the generator that needs to be started. There’s a space to crawl through at floor level that leads to a restroom, on the floor this note from the Director
The restroom door can be opened from the inside and it leads to the hallway outside the entrance to the treatment room. Go back into the treatment room flip the switch on the console and stand back, the numbers 9659 will be burned into the stretcher after which James will make a note of it on the map. Now return to the chained box room and enter the numbers into second lock, there’s a key to find before the box can be opened. Everywhere on the second floor is now explored so head up to the third floor using the stairwell in the northwest corner of the floor or left of the chained box room.
The Third Floor
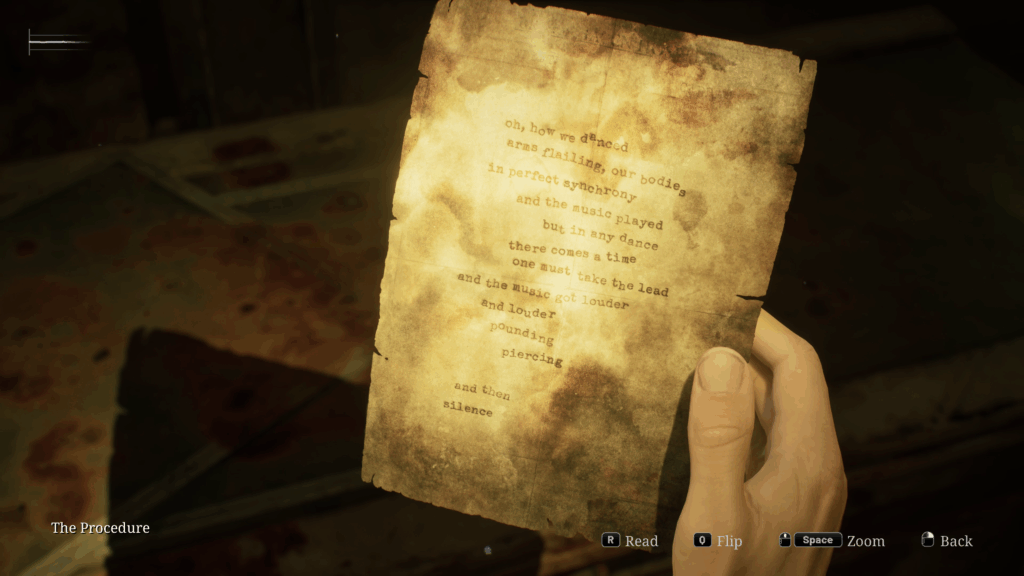
At the top of the stairs on the third floor to the right is the X-Ray room, there’s some handgun ammo in the cabinet beside the entrance on the right. On the X-Ray table is this note titled The Procedure
and on the view screen a couple of X-Rays of someone’s head showing chain inside their head. The next room is Exam room 4 and when you enter an auto-save occurs so that’s where this video ends.
Starting in the exam room 4 on the third floor there is a test dummy in the treatment chair and a rolling cart beside it. When you interact with the rolling cart James picks up a hammer which in this case is called Instrument Of Force. Next interact with the dummy, when you do one arm will be highlighted, switch to the dummy’s left arm and the hammer will come up for you to use, hit the arm and it will break off. Switch to the right arm and move it away from the front of the dummy’s face, when you do your inventory comes up but there’s nothing there you can use, so this is where the search begins.
There’s a chain that’s connected to the treatment chair that runs out the door into exam room 5 and then into room D1 so that’s where you need to take a closer look. The door to exam room 5 is blocked but you can hop through the window to get there. Before the hospital went into the other world room D1 was the door with the combination pad lock just to give you an ideal where you are, since there is no mini map you must consult the main map regularly. In the hallway there’s is one Bubble Head Nurse, one crawling Lying Figure and on Manikin. I tried to take out the Bubble Head with my melee weapon and it looked good because she was having a head shaking fit but as happens so many times she came out of it at the same time I hit her and she didn’t go down, so I retreated into exam room 4. The Bubble Head didn’t follow me there so I had to go back out into the hallway and try again. This time a Lying Figure came slithering out so again instead of fighting in the hallway where the Bubble Head was likely to join I retreated back into exam room 4 and took it out there. Back in the hallway for the third time the Bubble Head was again in a head shaking fit and this time I put her down for good. At the end of the hallway to the left you can see a Manikin crouched under a desk, shoot it to get it moving and finish it off either with two more shots or one more and your melee weapon. At the end of hallway there’s another hallway to the right that goes a short distance and then turns left. Slowly approach the corner with pistol ready , when you round the corner a Manikin will spring up from behind a small table, on the small table is a health drink. In the room that was there before D3 there’s a rolling cart with some shotgun ammo on it and the desk that the Manikin was hiding under in the drawer is some handgun ammo. Across from the desk the end wall to room D2 is cracked, break it and squeeze through, the door back into the hallway can be unlocked from the inside and the wall between rooms is broken down. Looking into the next room you can see the chain running across the floor, when you get there you discover the chain going into a hole in the floor and a ladder that’s going down. The ladder leads to the first floor kitchen.
The First Floor
At the bottom of the ladder the chain goes left and into the hallway, almost right away a crawling Lying Figure will go slithering into the pantry at a high rate of speed, so you have to be on your guard at all times. At the north end of the pantry on the left is some handgun ammo.
Restroom 1
To the right there’s a hole broken into the wall leading to one of the restroom, inside a manikin hiding which by now should be fairly simple to take out but I messed it up and made it harder than it had to be and there was no loot.
Restroom 2
There’s a hallway at the end of the pantry that leads to the other restroom which is around the corner to the left and on the corner there’s some shotgun ammo. Inside the second restroom there’s one Bubble Head Nurse, she’ll come out of the closet after you enter, now these are a little harder to take out but if you’re careful you can do it without taking any damage, that was not the case here where I took huge damage and had to use a syringe so I wouldn’t die. One of the things I did wrong was turn my flashlight off and not back on after the first hit and I got stuck in the small restroom instead of retreating into the hallway. Anyway in the closet there’s some shotgun ammo, on one of the sinks some handgun ammo and on the wall a first aid kit with a syringe in it. The door out can be unlocked from the inside leading you back into the hallway, just to the right is the hallway that leads to the dining room. Part way up the hallway the chain runs across and up into a locked room, but there’s another way in.
The Kitchen
On your way to the dining room there’s some handgun ammo on a chair to the left.
The Dining Room
The dining room is unusually lit up, from the kitchen doorway you can see one Bubble Head Nurse to the left. I wanted to take it out with my melee weapon but as I was sneaking up behind her she turned around and I had to make a hasty retreat all the way back into the pantry. It took me two more attempts to put her down for good. With her out of the way matters can turn to loot which there’s only one pack of handgun ammo at the back of the room.
Storage/Medical Records.
From the dining room you can see a Bubble Head Nurse shuffling past the doorway that leads to Storage and looking closer you can see a Manikin to the left of the entrance, in total there are two manikins and one Bubble Head Nurse. If you time it right and get behind the Bubble Head Nurse as she passes by the door you have a good chance to take her down with one hit and then finish her off by putting the boots to her. To the left of the door there’s some handgun ammo in the desk drawer on the left, from there look to your left and you’ll see one of the Manikins crouching in the open at the back of the room. The other Manikin is to the left of the entrance leaning up against some shelving, three shots will take these things down but if you’re short on ammo two shots and finish with the melee weapon. On the shelf to the left of the entrance there is some shotgun ammo and along the wall to the right in a cabinet with glass doors a health drink. At the back of the room there is a narrow opening broken into the wall, there are no enemies so you can squeeze through with no worries. In the wall on the right is the same painting on the wall with hands reaching up as the one on the second floor, above that is an item marked with a white dot. When James picks it up it’s labeled Key Of Bliss. The door to the hallway can be unlocked from the inside so with the key head back up to the third floor to exam room 4.
Third Floor Second Visit.
When you interact with the dummy the key of bliss will come up in your inventory, when you select use a short cutscene will play showing the Key Of Bliss poking the dummy’s left eye a couple of times until the material around the eye falls and then James’ hand with a key. This key is called Lapis Eye Key and it’s the key to the chained box on the second floor so that’s the next stop.
Second Floor Second Visit
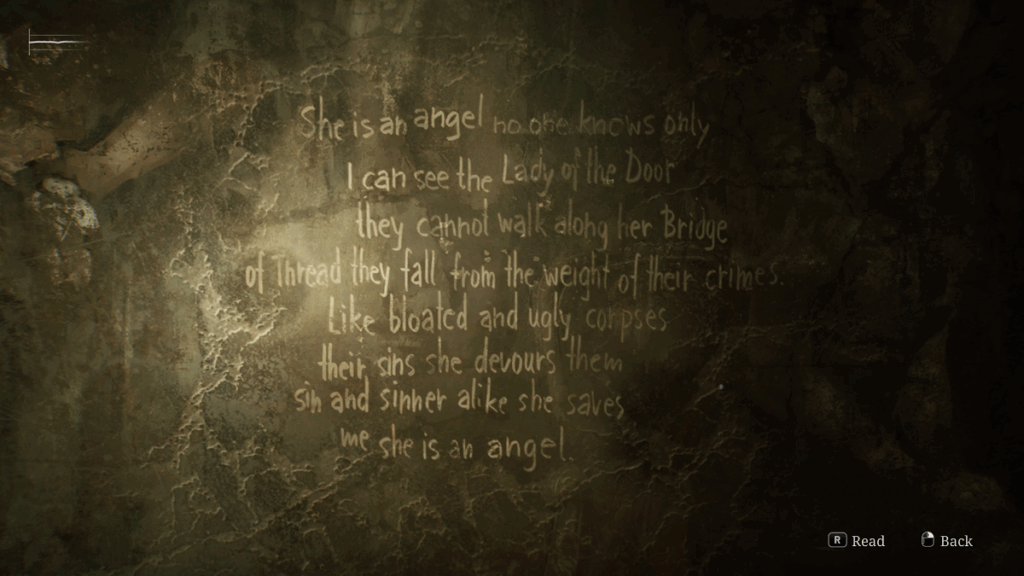
The manual save is there if you want to save your game before you open the box. When you click on the white dot your inventory will open with the Lapis Eye Key showing, when you select use a cutscene will play showing the box unlocking and James opening it. He stares into the box for a few seconds and you get a look at what’s inside, the box is empty and then the scene goes back to James who has a I can’t believe it look on his face, while he’s thinking a curtain behind him falls to the floor revealing a door embossed with a woman. James walks over to the woman and takes something out of her mouth. The cutscene ends and you get a closer look at the item that was in the woman’s mouth, it’s an elevator button for the basement floor. Beside the door to the right is this writing on the wall
And to the right of that is an elevator that will take you to the basement level. BEFORE YOU GET INTO THE ELEVATOR MANUALLY SAVE YOUR GAME. Enter the elevator and click on the white dot on the panel, cycle down to the bottom button that’s missing, open your inventory and select the -1 button to insert it into the panel. Now press the button and head down into the basement. As soon as the door closes the radio starts to play and you find yourself a contestant on a game show called Trick Or Treat. If you answer correctly a valuable prize if you’re wrong punishment. Unless you record your games I don’t see how you are going to remember the questions and answers, and that’s why I told you in bold to save before entering the elevator so if you missed something the first trip down you can reload the last save and ride down multiple times. The game show host will ask three question each with three possible answers, the first question is about how many souls were lost in the early eighteen hundreds when a terrible disease spread across Silent Hill?. The answers he offer are one 42, two 67 and three 85. The correct answer is two 67 which is displayed along the boardwalk in Rose Water Park.
The second question is a map question asking which road takes you toward the lumber yard and the cemetery, what is the name of that road? The answers are one Bachman Road, two Munson Street and three Wiltse Road. The correct answer is three Wiltse Road and that’s in your inventory under maps and it’s the second map that you got.
The third question is about a double murder of a brother and sister, one of the victims was Billy Locane what was Billy’s sisters name?. The answers are one Miriam two Heather and three Julia, the correct answer is one Miriam.
The Basement Second Visit
An auto-save occurs when you exit the elevator. The way to the right is blocked and the door to the maintenance room is locked so you have to go left. The rusty corridor makes a right at the corner, the wall to the maintenance room on the right is broken down allowing you to enter. The way to the left is open with walls broken down allowing you to enter them all. On the left side is the Kitchen Disposal room, just before that is an unnamed room with some handgun ammo and one small crawler. In the Kitchen Disposal room there’s one Bubble Head Nurse and one Manikin hiding in the corner across from the entrance. On the shelf near the entrance there’s some handgun ammo, at the back of the room in the cabinet with the glass doors there’s some shotgun ammo and on the right wall there’s a first aid kit with a health drink inside. Back in the maintenance room in the back right corner there’s a narrow opening broken into the wall that you can squeeze through, there are no enemies so squeeze through with your mind at ease. You are now in the generator room where you refueled and started it in the before time. Double doors lead out into a hallway with Laundry Storage, Laundry room and Storage room on the right and two boiler rooms on the left.
The Laundry Storage
Inside the laundry storage there’s one Manikin hiding behind a shelf on the right, there’s also some handgun ammo on the shelf along the right wall.
The Storage Room
The wall between all three rooms is broken down so you can travel to the end because the hallway floor is not there. As you enter the Storage room your radio will be crackling, this is cause by one crawling Lying Figure. Just inside the Storage room on a shelf on the left is a health drink. The Storage room exits into the hallway on the other side of the missing floor section. The hallway goes right and then left around the corner, at the end of the hall there’s some handgun ammo. There’s a narrow opening broken into the wall of Boiler Room 10, there are no enemies in this room but there is one Bubble Head Nurse in the other Boiler Room. At the back of the second Boiler room there’s some crates stacked up so you climb up an over the opening in the wall at ceiling height. You’ll land in the hallway on the other side of the gap crated by the missing floor. Ahead is another narrow space, this one leads to the Pump Room.
The Pump Room
There are no enemies in this room, at the front of the room on the right near the entrance there’s a copper ring and a box covered with a sheet. When you click on the white dot you’ll get a closer look, as soon as you’re finished looking at it a cutscene plays showing Maria walking into the Pump Room out of the darkness. Maria calls for James, James mistakenly thinks it’s Mary and then apologizes. There have a reunion of sorts and when the cutscene ends an auto-save occurs and you’re on the trail looking for Laura again.
The Pump Room exits into the hallway that leads to the staircase to the first and second floors.
First Floor Second Visit
The staircase is not fully intact so it’s only good up to the first floor. At the top of the stairs the wall to Exam Room 2 on the right is broken and so is the wall between Exam Rooms 2 and 3. In Exam Room 3 there is a first aid kit on a tray along the left wall with syringe inside. The door to the hallway is open, when you get into the hallway Maria will take the lead so follow her, you’ll have some light conversation along the way, your little stroll through the rain ends at the pool. In the pool on a bench along the back wall is this photo
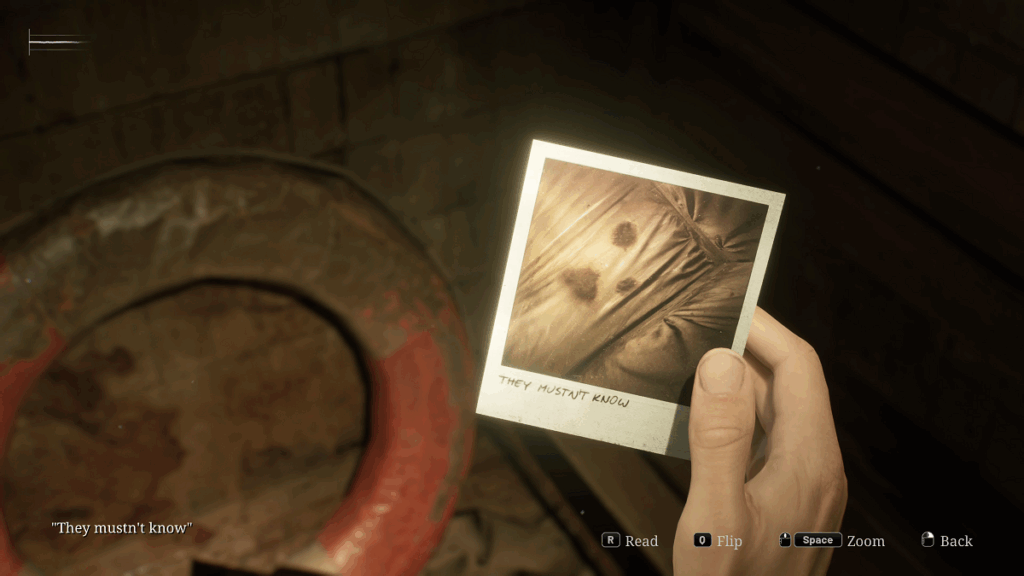
and on the back looks like the number 73. The pool leads to the Shower Room and then out into the hallway outside the Doctors Lounge.
The Doctors Lounge
In the Doctors Lounge there’s a freezer in the middle of the floor, as you enter Maria brings it to your attention. When you get close to it you’ll see that it’s marked with a white dot, when you click on it a cutscene starts showing James trying to open the lid, when he can’t Maria helps and they get the lid open. When they get the lid open they are driven back by the stench, after it clears Maria notices a ring inside and picks it up, she remarks that it’s not very cute and gives it to James. When James takes the ring you get a closer look, it’s a lead ring and James says he thinks he knows where they belong. The Doctors Lounge exits into the Locker Room, inside on a bench to the left is this note.
The Locker Room door that exits into the hallway can be unlocked from the inside, to the right is a manual save. Down the hall from the manual save is the elevator on the left and the Pharmacy on the right. Inside the Pharmacy in the back left corner is a Decorative Box that’s the prize from the game show that played as you were riding down in the elevator. I tried to guess the answers but failed miserably, you only get one chance to get it right so before you try save your game at the manual save.
The first order of business before you head to the second floor is to open the decorative box and collect the valuable loot inside. The decorative box is in the Pharmacy across from the elevator. I’ve already detailed the questions and answers earlier in this post so to summarize the correct numbers to open the box are as follows: Quest 1 is number 2. Question 2 is number 3 and question 3 is number 1. Inside the box are two syringes and two boxes of shotgun ammo, to good to pass up. Now you can travel up to the second floor via the elevator across the hall.
The Second Floor Last Visit.
There are no enemies where you’re going on the second floor so exit the elevator and go to your right, the chained box room is just around the corner. When you get out of the elevator Maria will ask “What’s that”? she is referring to the strange door embossed with a woman just to the right of the elevator along the same wall. The door is marked with a white dot and when you click on it Maria becomes frightened and asks James to “just get out of here”. The woman’s hands both have places to put the rings you found in the Doctors Lounge, I put them on in the order they came up so lead ring on the right and copper on the left. When you put the second ring on a cutscene will start showing the door clunking open. James walks through but Maria doesn’t want to go because “something doesn’t feel right”. After a reassurance from James that “it’s gonna be fine” Maria takes his hand and they walk through the door closing behind them. The cutscene ends an auto-save occurs and you’re back in control at the top of a set of stairs. On the first landing there’s a piece of paper with the words “It is done” on the front and “Sick no more” on the back and just down from there a manual save. It’s be a good idea to save your game here before going any further. You eventually get to the last set of stairs which are longer than the ones before, with a door on the left that’s locked. At the bottom of the last set of stairs is a door the leads maintenance corridor, after you walk a short distance an auto-save will occur. The first part of the corridor doubles back on itself and when you reach the turnaround point a short cutscene will start showing the door that you just came through and James stopping to look to see what was making the noise. When James see Pyramid Head coming he yells at Maria to run and the cutscene ends abruptly and you’re back in control. Start running, it’s more like jogging, and jump over the cabinet that falls,watch for concrete falling on the grating and avoid those areas, stay to the left at first and then on the right hand corner go to the inside, then on the next left stay on the inside to avoid Pyramid Heads lance. Maria is ahead of you the whole time when the light comes on at the end of the corridor James says “There! An elevator” and a cutscene starts showing James now in front of Maria running for all he’s worth. Maria trips and falls to the floor. By this time James is already in the elevator trying to hold the door open for Maria, she makes it to the elevator but the two of them couldn’t get the doors open and Pyramid Head catches up and impales Maria through the torso. There’s a look of shock on Maria’s face as the camera pans down to show the lance protruding from her midsection. James is in disbelief and doesn’t know what to do until Pyramid Head pulls Maria away from the elevator closing the doors. James drops to his knees the doors open and the cutscene ends. When you’re back in control and an auto-save occurs and you’ll get the Alone Again achievement, for you are alone again indeed.
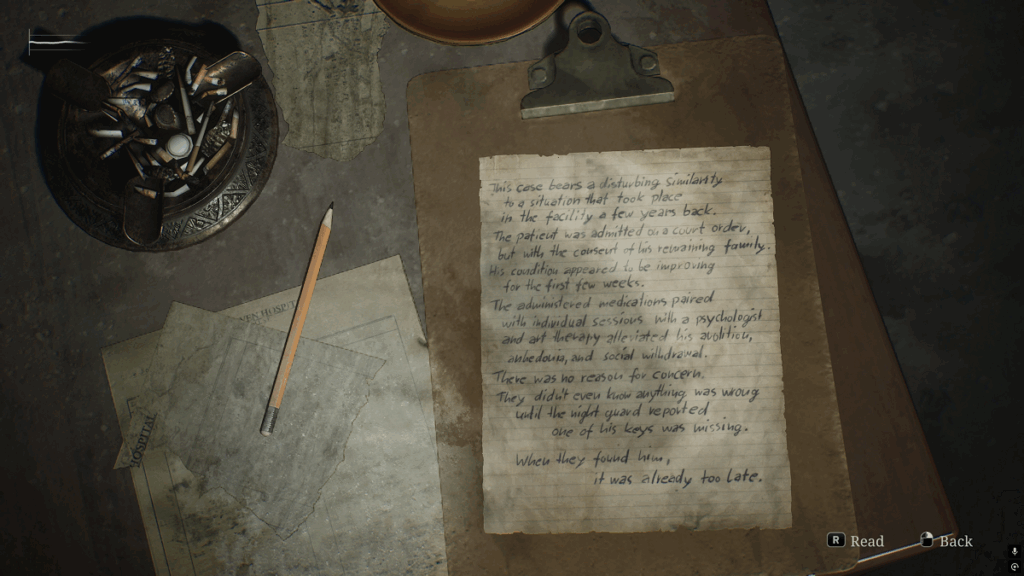
This is the last video of the Brookhaven Hospital, for the rest of the hospital there are no more enemies so continuing from the elevator go right and follow the hallway around the corner to the right. The door to Examination room 1 on the right before the lobby will be ajar, inside in the back left corner is a health drink. You’ll need a key to exit the hospital which you can find in the reception office. On the desk in the back right corner there’s a book with this written inside,
“The potential for this illness exists in all people and , in the right circumstances, any man or woman would be driven , like him to the other side.
The other side perhaps may not be the best way to phrase it. After all, there is no wall between here ant there. It lies on the border where reality and unreality intersect.It is both close and distant.
Some say it isn’t even illness. I cannot agree with them. I’m a doctor, not a philosopher or even a psychiatrist, unlike the Director.
But sometimes I have to ask myself this question. It’s true that to us his imaginings are nothing but the inventions of a busy mind. But to him, there simply is no other reality. Furthermore, he’s happy there.
So why, I ask myself, why in the name of healing him must we drag him painfully into the world of our own reality?
After reading James picks up the key and a short cutscene will play showing Laura running away into the rainy darkness and at 5:15 in the video I exit the hospital. The rest of the video belongs to the next post.
So that’s it, a long post but in it you’ll get most of what you need to navigate in and out of the hospital, I might have missed a bullet here and there but that’s for you to make sure you explore everywhere.
Thanks for reading! Your support means a lot, and I truly appreciate each and every one of you for taking the time to follow this guide. May your adventures be thrilling and filled with victories. God bless, and I look forward to connecting with you in the next post!